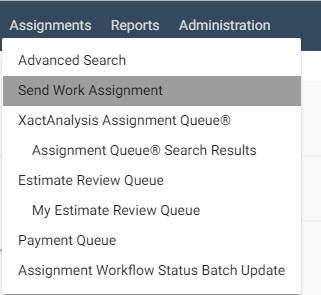
Send Work Assignment
Using the Send Work Assignment form, you can create assignments and send them to assessors and builders electronically via XactAnalysis®. You can then track and evaluate the assignments using other tools in XactAnalysis. Prior to sending a real assignment, you may send a test assignment to confirm that the system is functioning properly. Test assignments are not included in XactAnalysis reports. You may also send a single assignment to multiple assessors or builders for complex claims.
The screen shots in this document are generic, and your company’s interface may vary.
Access Send Work Assignment
Select Send Work Assignment from the Assignments menu. The Send Work Assignment form appears.
Create and send an assignment
Select a data set from the Data Set menu, if available.
Complete the form. Start with the Property Owner / Risk Information section, as some data entered here is used to determine what appears in the SmartLists later in the form. For a detailed explanation of the form, see Send Work Assignment fields and menus. Required fields are marked with an asterisk (*) and must be completed before the form can be submitted. To clear the form, click Clear (at the bottom of the form, to the right of Submit).
- When you have completed the form, click Submit. If you miss a required field, the assignment is not submitted and XactAnalysis highlights the field you missed. Update that field and re-click Submit.
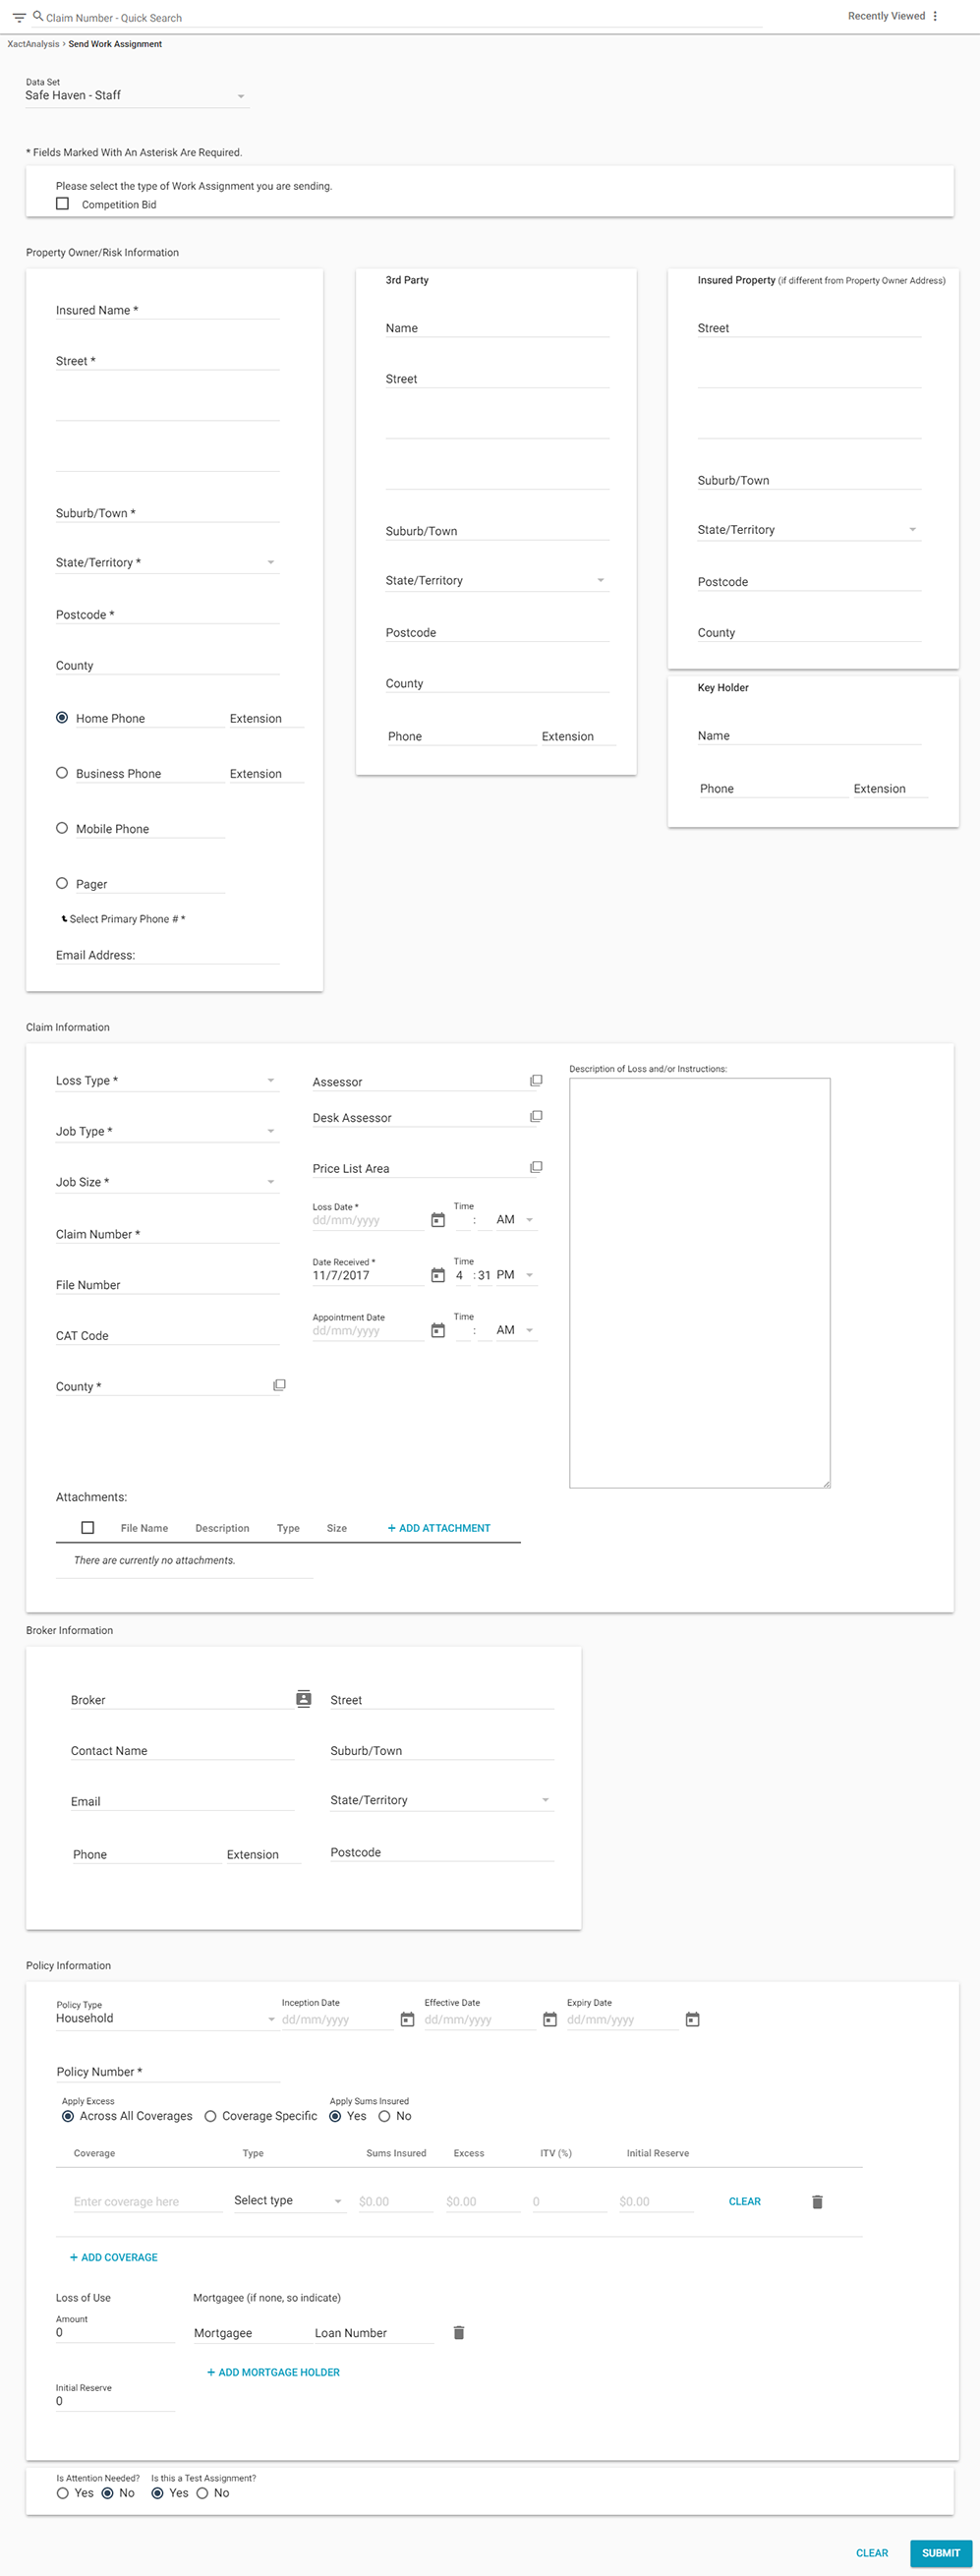
- After you submit the assignment, a copy of your assignment appears. If the information is correct, click Send Assignment. If information is missing or incorrect, click Back to make changes in the Send Work Assignment form.
After you send the assignment, you are notified that the assignment was sent successfully.
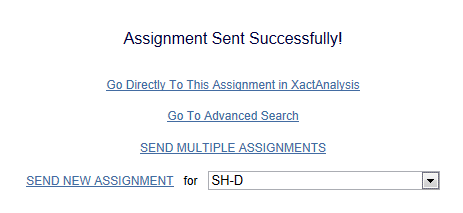
In the Assignment Sent Successfully page you may select one of four options:
Go Directly to this Assignment
Select this link to go to the Assignment Detail page of the new assignment.
Go to Advanced Search
Select this link to go to Advanced Search.
Send Multiple Assignments
Select this link to go back to the Send Work Assignment form you just completed so you can send the assignment again as a Multiple Assignment.
Send New Assignment
Select this link to go to a blank Send Work Assignment form.
Schedule an initial inspection
- In the Claim Information section of the Send Work Assignment form, click Schedule Initial Inspection next to the Assessor/Builder SmartList. The Schedule Initial Inspection dialogue box appears.
- Select the appropriate appointment options and click Search. XactAnalysis searches for assessors/builders that are qualified and available for the appointment based on your selections. It then populates the page with a list of them.
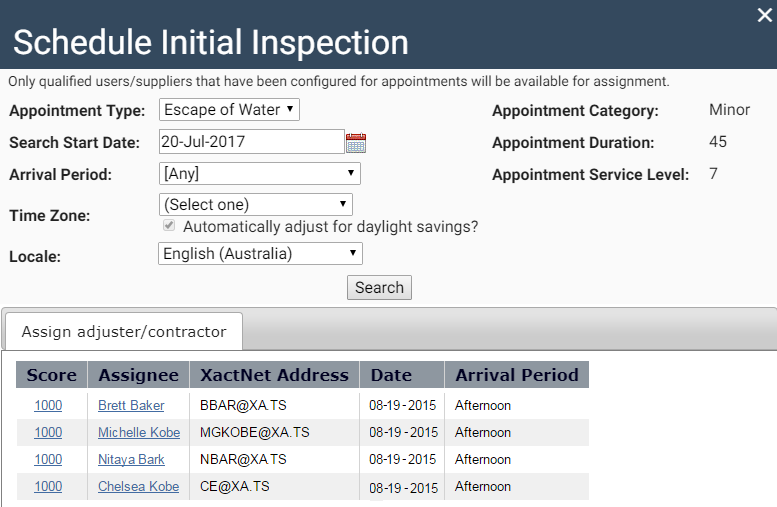
- Select the name of your preferred assessor/builder. The assignee and policyholder are automatically sent email notifications.
Send Work Assignment fields and menus
Data Set Rotation
If you have data set rotation enabled, the following fields appear in Send Work Assignment:
Data Set Rotation
Select Yes to include the assignment in your data set rotation, or No to exclude it from your rotation.
Postcode
Type the Postcode for the assignment. The next data set in your rotation that is qualified for this area will be assigned.
Data Set
This field allows you to manually select a data set for the assignment. If you select any data set other than the next one in rotation, you are required to provide a reason.
Assignment Type
Assignment Type
Select the appropriate assignment type (e.g., Claim, FEMA flood, Task, Competition Bid).
Property Owner / Risk Information
Insured Information
- Enter the insured's name and address.
- Enter the insured's phone numbers. Select a radio button to indicate the primary number.
- Enter the insured's email address.
3rd Party
Enter the 3rd party’s name, address, and phone number.
Insured Property
Enter the insured property address (enter if different from property owner address).
Key Holder
Enter the name and phone number of the person to contact to access the insured property (enter if different than property owner’s name and phone).
Claim Information
Loss Type
Select a loss type. The loss type is the damage-causing event (e.g., earthquake, fire, flood, theft, etc.).
Job Type
Select a job type. The job types listed are customised by your company. Common job types include general, emergency, mitigation, Contents, and Xactimate Express. If you create an assignment with a Contents or Xactimate Express job type, you can access the assignment in XactContents Online or Xactimate Express without an additional login by selecting the Access Online Estimate link on the Assignment Detail page.
Job Size
Select the projected size of the job based on cost.
Claim #
Enter the claim number. Click Check for Duplicates to check for duplicate claim numbers. This can help you avoid creating an assignment that has already been created.
Claim File
Click the field or SmartList button to open a dialogue box that allows you to either add the assignment to an existing claim file or create a new claim file for the assignment. For more information about claim files, see Claim View.
File Number
Enter the file number.
Case Manager
Enter the name of the case manager / builder / assessor assigned to the assignment.
CAT Code
Enter a catastrophe code if applicable.
Program Location
Select a program location from the SmartList. These options are based on the property owner’s postcode (which you entered in the Property Owner / Risk Information section).
Assessor/Builder
Select an assessor or builder from the SmartList. This list shows only assessors and builders qualified for the selected data set and area, based on the property owner’s postcode. See Assessor/Builder Rotation to set up an automatic rotation for the assessors/builders in the list.
Desk Assessor / Project Manager
Select a desk assessor or project manager from the SmartList.
Price List Area
Select a Price List Area from the SmartList. The default area is based on the property owner’s postcode entered in the Property Owner / Risk Information section.
Loss Date
Enter the loss date or select a date using the calendar button. Enter the time of the loss and select a time zone. You cannot enter or select a future date in this field.
Date Received
Enter the date received or select a date using the calendar button. Enter the time received and select a time zone. You cannot enter or select a future date in this field.
Appointment Date
Enter the appointment date or select a date using the calendar button. Enter the appointment time and select a time zone.
Description of Loss and/or Instructions
Enter a description of the loss or special instructions for the assessor or builder.
Attachments
To attach a file, click Add. The Upload Attachments window appears. Click Browse… to find the file you would like to attach. Repeat to attach more files. Write a description of the attached files in the Description field and click Upload. When the page refreshes, the file names, descriptions, types, and total size of the attached files appear to the right of the Add and Delete buttons. To delete an attachment, select the check box for the file, and click Delete.
Policy Information
Policy Type
Select the type of policy (domestic, commercial, etc.).
Policy Number
Enter the policy number (required).
Effective Date
Enter the date the policy took effect.
ExpirationExpiry Date
Enter the date the policy expires.
Add coverage
Select to add a line of coverage.
Apply Excess
Select a radio button to specify how to apply the excess (across all coverages or coverage specific).
Sums Insured
Select a radio button to specify whether or not to apply coverage limits.
Coverage table:
- Enter the name of coverage.
- Select a type of coverage.
- Enter the policy limit and excess.
- Select what the coverage applies to: R/C (Replacement Cost), IV (Indemnity Value), or Both.
- Enter the ITV (Insurance-to-value: the cost to rebuild and replace everything after a total loss) and initial reserve amount.
- Add more lines of coverage by selecting Add Coverage.
- Select Clear or Delete to clear or delete a line of coverage.
Mortgage Holder
Write the name of the mortgagee and the loan number. To add another mortgagee, select Add Mortgage Holder. If there is no mortgagee, write none in the field. Select Delete to delete a line.
Loss of Use
Specify the amount and/or initial reserve for loss of use.
Is Attention Needed?
If available, select to change the attention status of the assignment.
Is this a Test Assignment?
Select to make this a test assignment. Test assignments are not included in counts and reports.
Submit
Click to submit the assignment.
Clear
Select to clear the form.