Qualifications
- Access Qualifications
- Qualify assessors and builders
- Edit assessor and builder settings
- Edit the assessor/builder address
- Adjust qualification status
- Adjust job type and size
- View user information
- View Xactimate profiles
- Add unique identifiers
- Add employee number
- Adjust business unit
- Adjust home area
- Adjust assignment capacity
- Add assessor/builder notifications
- Send a test notification
- Define assessor/builder service area
- Assign postcodes in a region to a service area
- To assign all postcodes in a program location to an assessor or builder’s service area
- Assign a single postcode to an assessor or builder’s service area:
- Assign postcodes in a state/territory to an assessor or builder’s service area
- Assign states/territories to service area
- Edit Contact Methods
In the Qualifications module, you can qualify assessors and builders to receive assignments via XactAnalysis®. You can also edit their settings, add notifications, and perform a number of other actions.
The screen shots in this document are generic, and your company’s interface may vary.
Access Qualifications
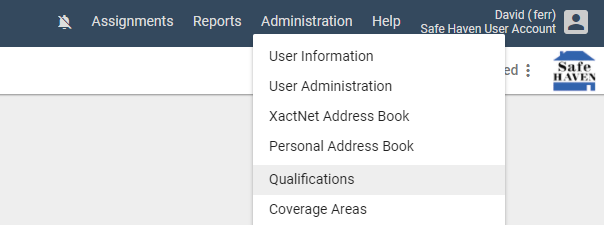
Select Qualifications from the Administration menu.
Qualify assessors and builders
When you qualify an assessor or builder for a data set, the assessor or builder can be assigned assignments in that data set. Insurer employees can be qualified for individual data sets within their organisations, but independent assessors can't; they are qualified at the organisation level. If an assessor/builder is not qualified, they don't appear on assignment smartlists. See Assessor/Builder Rotation for more information about setting up an automatic assessor/builder rotation in smartlists.
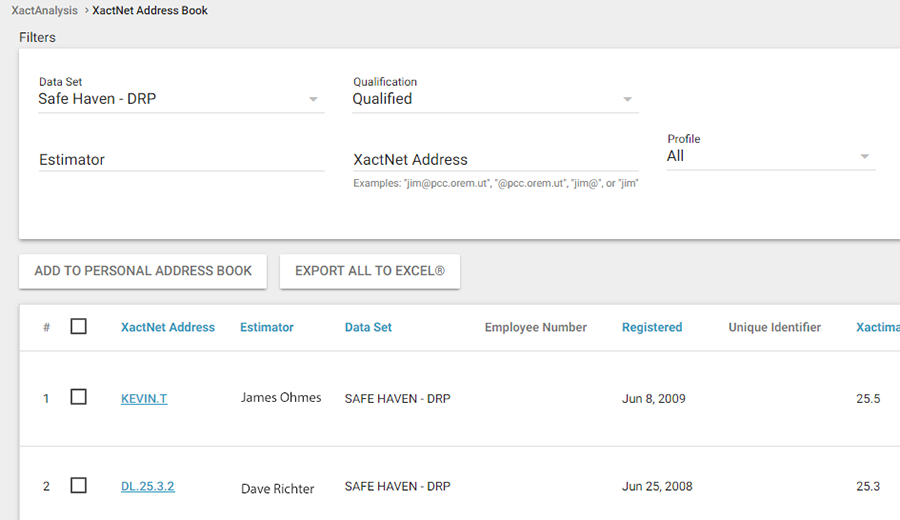
- If your organisation has multiple data sets, select the data set in which the assessor or builder will work (see image below).
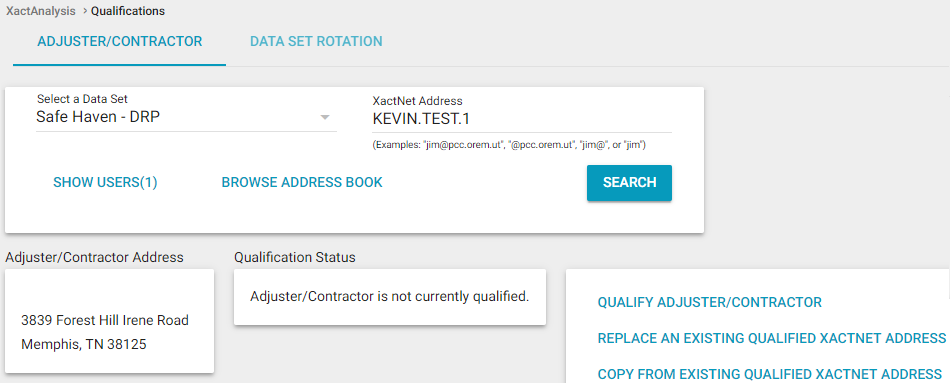
- Enter the assessor or builder’s XactNet address or partial address in the XactNet Address field, and click Search.
- If you entered the correct address, the Qualifications page appears. If there is more than one result, select from the list that appears.
- On the Qualifications page, click Qualify Assessor/Builder. If you receive a message stating that the XactNet address does not have the necessary profile installed, contact your product specialist or account manager to add the profile to your key code.
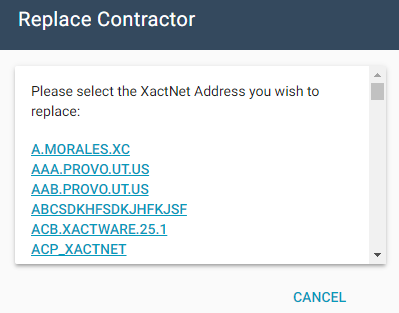
Replace an existing qualified XactNet address with another XactNet address
- Click Replace an existing qualified XactNet Address. A dialogue box appears.
- Select the XactNet Address you wish to replace. A confirmation dialogue box appears.
- Click OK.
Copy qualifications from another qualified XactNet address
- Click Copy from existing qualified XactNet Address. A dialogue box appears.
- Select the address you want to copy. A confirmation dialogue box appears.
- Click OK.
Edit assessor and builder settings
After you qualify the assessor or builder, you can add or edit information specific to that individual, including:
- Assessor/builder address
- Qualification status
- Job type and size
- User info
- Xactimate profiles
- Unique identifiers
- Employee number
- Business Unit
- Assignment capacity
- Assessor/builder notifications
- Service areas
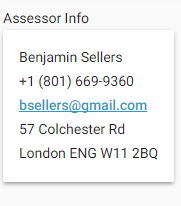
Edit the assessor/builder address
- Click Edit in the Assessor/Builder Address section.
- Edit the address fields that appear.
- Click Edit Contact Methods to edit the contact methods associated with this assessor or builder. See Edit Contact Methods for more information.
- Click Update.
- Click Add to Personal Address Book to add the assessor or builder to your personal address book.
Adjust qualification status
You can select Assessors or builders according to how qualified they are to handle various types of claims by selecting a tier. These tiers carry over to adjuster or contractor rotation. This allows you to assign claims to your more qualified adjusters or contractors until they hit their weekly or monthly capacities.
- Select or clear the appropriate check boxes in the Qualification Status section. If you check a Disqualify box, a field appears where you can enter a reason for the disqualification.
- Select a tier from the Assignee Tier menu.
- Click Update.
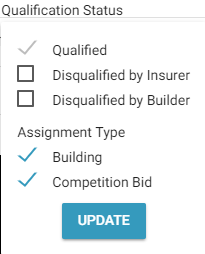
Adjust job type and size
When you assign an assessor or builder job types and sizes, they are restricted to assignments with those types and sizes only.
- Select or clear the appropriate check boxes in the Job Type and Size section.
- Click Update.
- Click Copy to Other Data Sets to copy the job type and size selections to other data sets.
View user information
The User Info section only appears when viewing a User@ XactNet address. This section displays the name and contact information for the individual user. This is different than the Assessor/Builder Address, which is the same for all users of that XactNet address.
View Xactimate profiles
The Xactimate Profiles section displays the Xactimate profiles and versions installed by the assessor or builder.
Add unique identifiers
Unique identifiers serve as an additional method for identifying assessors and builders.
- Click Add Unique Identifiers in the Unique Identifiers section.
- Enter a unique identifier in the field that appears. Add another unique identifier by clicking Add Unique Identifiers again.
- Click Update.
Add employee number
Employee numbers serve as an additional method for identifying assessors and builders.
Enter the employee number in the Employee Number section, and click Update.
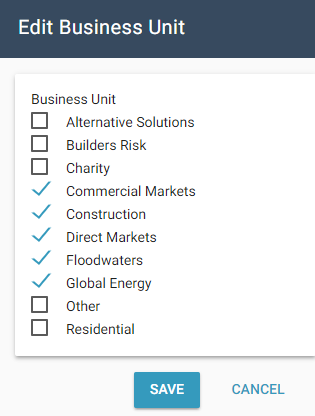
Adjust business unit
When you assign business units to an assessor or builder, they are restricted to only assignments with those business units.
- Click Edit in the Business Unit area.
- In the dialogue box that appears, select or clear the appropriate check boxes.
- Click Save.
Adjust home area
Adjusters and contractors can be assigned home areas, or geographic areas in which they normally work. Their work can then be tracked based on proximity to these areas.
- Click Add in the Home Area section.
- In the dialogue box that appears, select a state and county from the menus to see the postal codes for that county.
- Select the appropriate postal codes, and click Continue.
- A confirmation dialogue box appears. Click Assign.
- To remove postal codes from the home area, select the postal codes in the Home Area dialogue box, and click Remove.
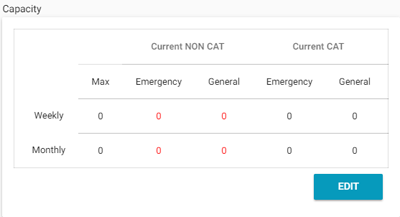
Adjust assignment capacity
The Capacity table shows the assessor or builder’s weekly and monthly assignment capacity and number of in-progress assignments. When a claim is being assigned, assessors and builders who have reached or exceeded their assignment capacity appear at the bottom of the Assessor/Builder SmartList (or selection list).
- Click Edit in the Capacity section.
- Enter appropriate capacity figures in the fields.
- Click Save.
Add assessor/builder notifications
When adding notifications, you are instructing XactAnalysis to notify assessors and builders when assignments are sent to them, action items are created for them, or flooring analysis is returned.
- Click Add New Notification in the Assessor/Builder Notification section. A row of menus appear. Select the appropriate descriptor in each menu.
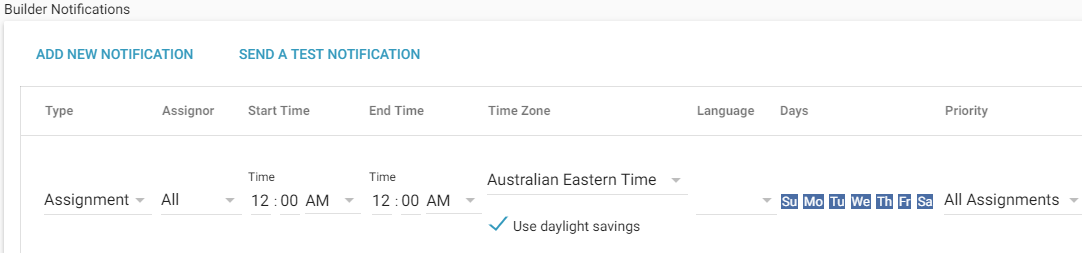
Select the type of notification:
Assignment
To notify individuals when assignments are sent to them.
Action Item
To notify individuals when action items are created for them.
Flooring Analysis
To notify individuals when flooring analysis data is returned.
Select the assignor (or data set) to which this notification rule applies.
Select the hours of the day the assessor or builder can receive notification. Leave the default of 12:00 AM to 12:00 AM to indicate any time of day.
Select the appropriate time zone for the assessor or builder.
Select a language for the notification email.
Select the days of the week the assessor or builder can receive notification. Selected days are highlighted in blue.
Select the level of assignment priority needed to trigger a notification:
Emergency Assignments
To notify individuals when emergency assignments are sent to them.
Normal Assignments
To notify individuals when normal assignments are sent to them.
All Assignments
To notify individuals when all assignment types, both emergency and normal, are sent to them.
Select the loss type to which this notification rule applies.
Select the contact method. To edit the available contact methods, click Edit List. See Edit Contact Methods for more information.
- Click Save. The new notification rule appears in the Assessor/Builder Notifications section.
Send a test notification
- Click Send a Test Notification in the Assessor/Builder Notifications section. The Send Test Notification dialogue box appears.
- Select a contact method from the drop-down menu.
- Click Send Notification.
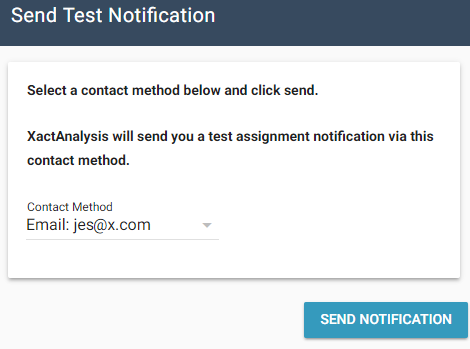
- A confirmation dialogue box appears and a notification is sent via the selected contact method. Click Back to send another test notification.
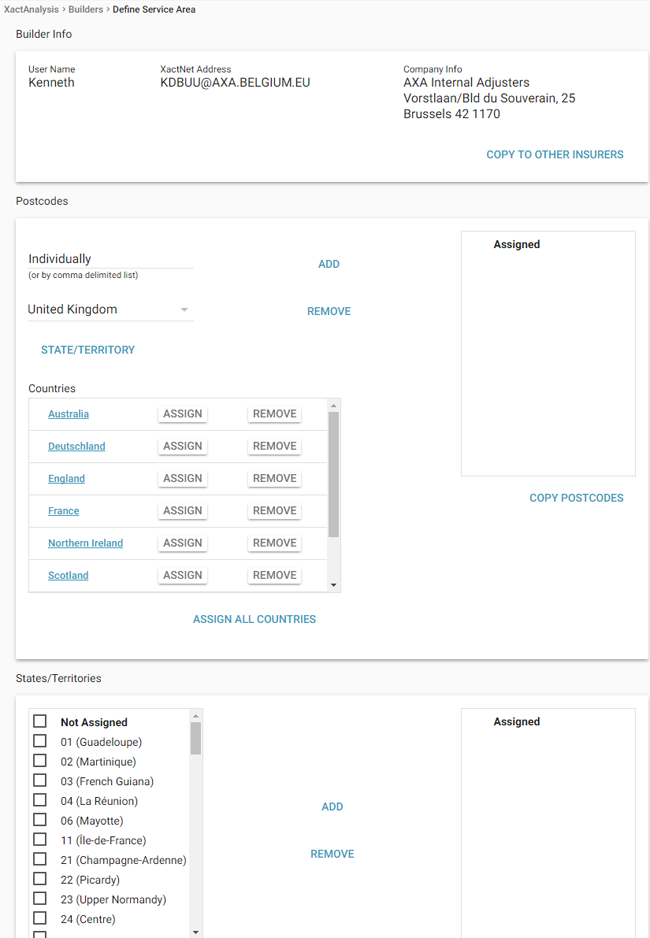
Define assessor/builder service area
An assessor or builder’s service area is the geographic areas where that individual can perform work. Assessors and builders cannot be assigned claims located outside their service areas.
- To define an assessor or builder’s service area, click Edit in the Service Areas section. The Define Service Area page appears.
Assign postcodes in a region to a service area
- Click Assign next to the region name in the Regions menu.
- A confirmation dialogue box appears. Click Assign. The postcodes included in the region appear in the Postcodes field.
To assign all postcodes in a program location to an assessor or builder’s service area
- Click a region name in the Regions menu. An Office Levels menu appears in place of the Regions menu.
- Click Assign next to the office level name.
- A confirmation dialogue box appears. Click Assign. The postcodes included in the office level appear in the Postcodes field.

Assign a single postcode to an assessor or builder’s service area:
- Click an AU county / NZ territorial authorities name in the AU County / NZ Territorial Authorities menu. A Postcode menu appears in place of the AU County / NZ Territorial Authorities menu.
- Click Assign next to the postcode.
- A confirmation dialogue box appears. Click Assign. The postcodes appear in the Postcodes field.
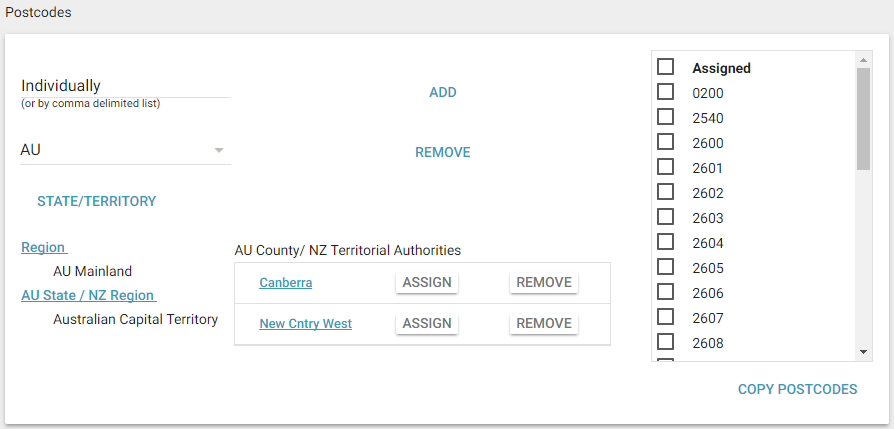
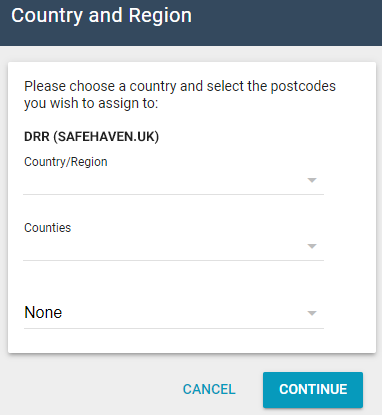
Assign postcodes in a state/territory to an assessor or builder’s service area
- Click State/Territory in the Assign Postcodes section.
- In the dialogue box that appears, select a state or territory in the respective menus.
- Select the appropriate postcodes in the postcodes menu, and click Continue.
- A confirmation dialogue box appears. Click Assign. The postcodes appear in the Postcodes field.
Assign states/territories to service area
- To assign states/territories to an assessor or builder's service area, select the appropriate states/territories from the State/Territory menu in the Assign States/Territories section, and click Add (see image above). The states/territories appear in the States/Territories field below the Postcodes field.
- To assign countries, select the appropriate countries from the Country menu in the Assign States/Territories section, and click Add (see image above). The countries appear in the Countries field below the Postcodes field.
- To go back to the Assessors/Builders page, select Assessors/Builders in the breadcrumb trail at the top left of the page. XactAnalysis automatically saves any changes to the service areas. The service area changes appear in the Service Area Map and Service Area menu.
Edit Contact Methods
When you click Edit Contact Methods in the Assessors/Builders Address section or Edit List in the Contact Methods column in the Assessor/Builder Notifications section, a dialogue box appears with a list of contact methods.
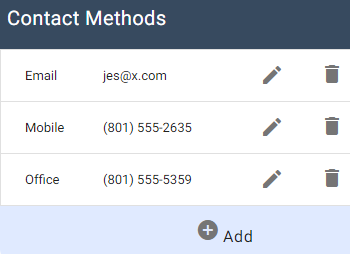
Add a contact
- Click Add. A form appears.
- Select the method Type:
- Text (SMS)
- Xactimate - notifications upload when adjusters/contractors connect in Xactimate
- Enter the contact information in the provided fields.
- Click Save. The contact is added to the list.
Edit a contact
- Click the Edit icon to the right of the contact information in the list. The form appears.
- Change the contact information as desired.
- Click Save. The contact information is updated in the list.
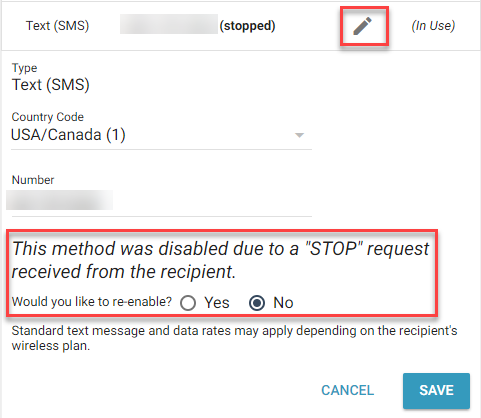
Stop and restart Text (SMS) notifications
When you create a Text (SMS) notification, recipients can choose to stop receiving the text messages by replying "stop". When this happens, "(STOPPED)" appears next to the contact method.
To restart notifications for the recipient, do the following:
- Click the Edit icon for the contact method.
- Select Yes next to "Would you like to re-enable?"
- Click Save.
Delete a contact
- Click the delete icon to the far right of the contact information in the list.
- A confirmation dialogue box appears. Click OK.
Perform other actions
After you have accessed the Assessors/Builders page for a specific XactNet address or User@ XactNet address, you can perform the following actions on other XactNet addresses or User@ XactNet addresses:
- Show all associated users
- Copy qualifications for this address to other data sets
- Copy qualifications for this address to other associated XactNet addresses
Show associated users
- To show all users associated with the XactNet address, click Show Users. This displays the primary XactNet address, as well as any associated User@ XactNet addresses. You can search for a specific associated user by using the search features.
- Click a user to view their Assessors/Builders page.
Copy qualifications to other data sets
- Click Copy to Other Data Sets. A dialogue box appears.
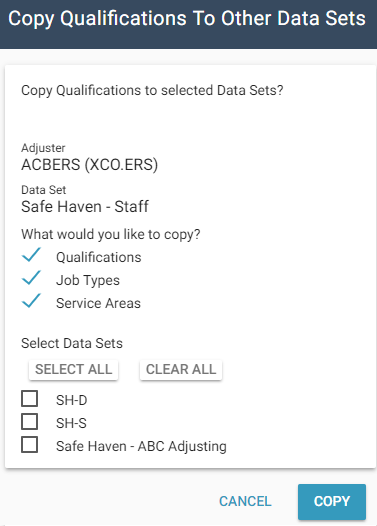
- Select the check box for each type of qualification you want to copy.
- Select the check box for each data set you want to copy the qualifications to.
- Click Copy. The qualifications for the XactNet address, including service areas and job type and size, are copied to the selected data sets and the XactNet address can now receive assignments from those data sets.
- A confirmation dialogue box appears. Click Close.
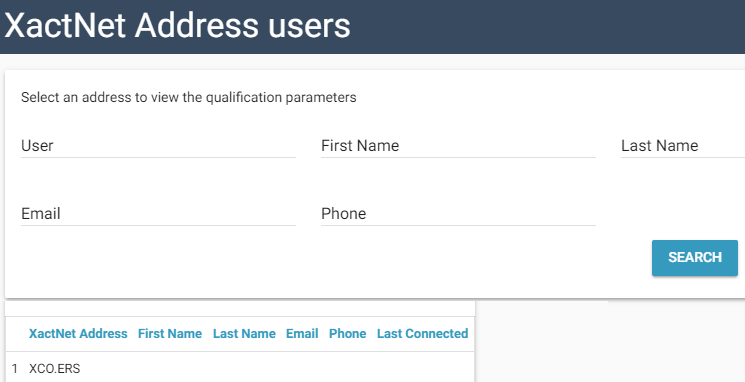
Copy qualifications to associated XactNet addresses
If viewing a User@ XactNet address or a traditional XactNet address that has associated users, you can copy qualifications to other associated users.
- Click Copy Qualifications to Other XactNet Address(es). The XactNet Address Users dialogue box appears. This displays up to 100 associated users.
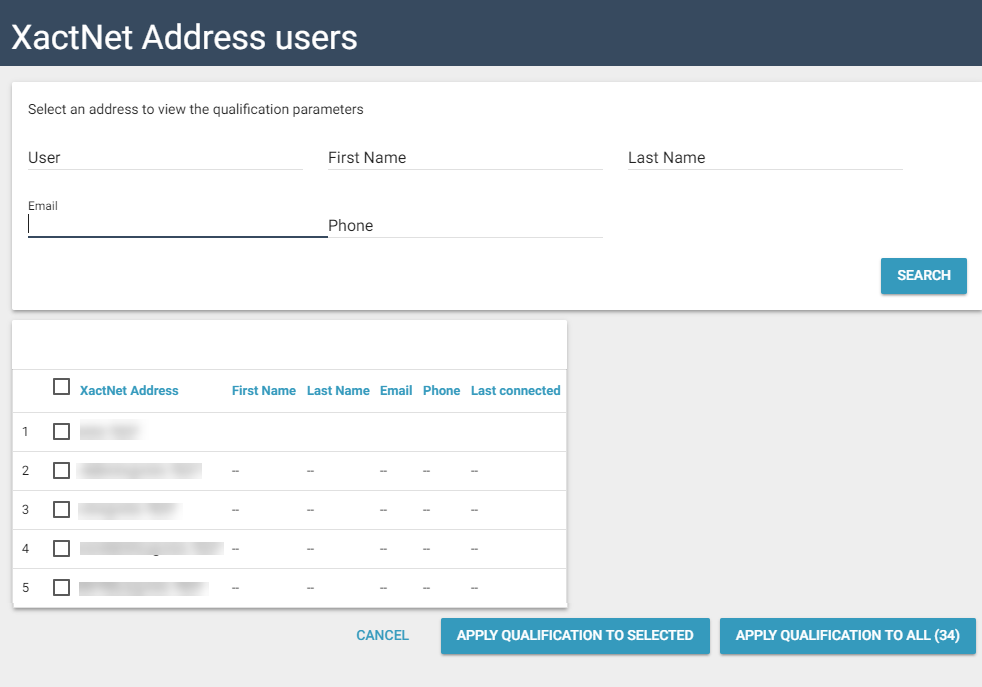
- If necessary, use the search filters to narrow the displayed results.
- Select the check box for each XactNet address you want to copy qualifications to.
- Click Apply qualification to selected. To apply qualifications to all users associated with the XactNet address, click Apply qualification to all.
- The qualifications for the XactNet address, including service areas and job type and size, are copied to the selected XactNet addresses.
- A confirmation dialogue box appears. Click OK.