Claim View
The Claim View feature allows you to manage multiple assignments linked to the same claim file and gives you an overview of the activities that occur on each of the assignments.
Access Claim View
When you view an assignment in Assignment Detail, a Claim View bar appears along the left side of the screen. You can click the bar to expand or collapse Claim View.
Attach or create a claim file
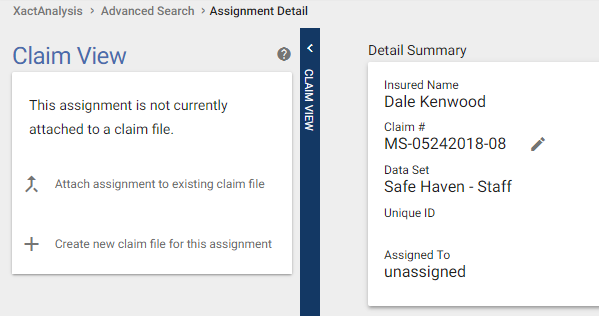
If the current assignment isn't connected to a claim file, links appear in Claim View that allow you to either attach the assignment to an existing claim file or create a new claim file for the assignment.
Attach an existing claim file to an assignment
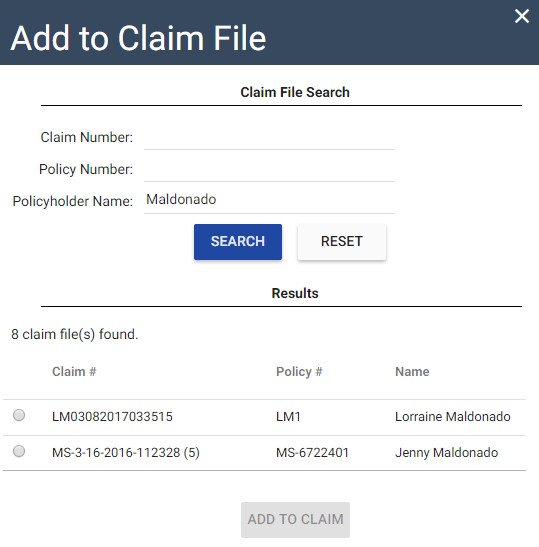
- Click Attach assignment to existing claim file. The Add to Claim File dialog box appears.
- Enter your search parameters in either the Claim Number, Policy Number, or Policyholder Name fields.
- Click Search.
- Select a claim from the Results list and click ADD TO CLAIM.
Create new claim file for assignment
When you select Create new claim file for this assignment, a new claim file is created in Claim View with a unique claim number.
Claim file information
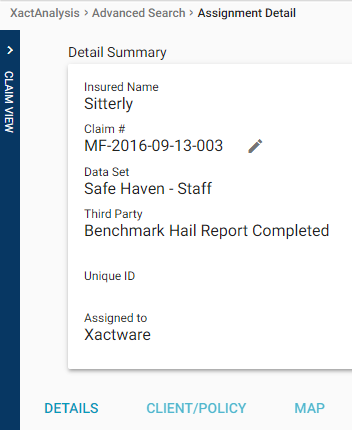
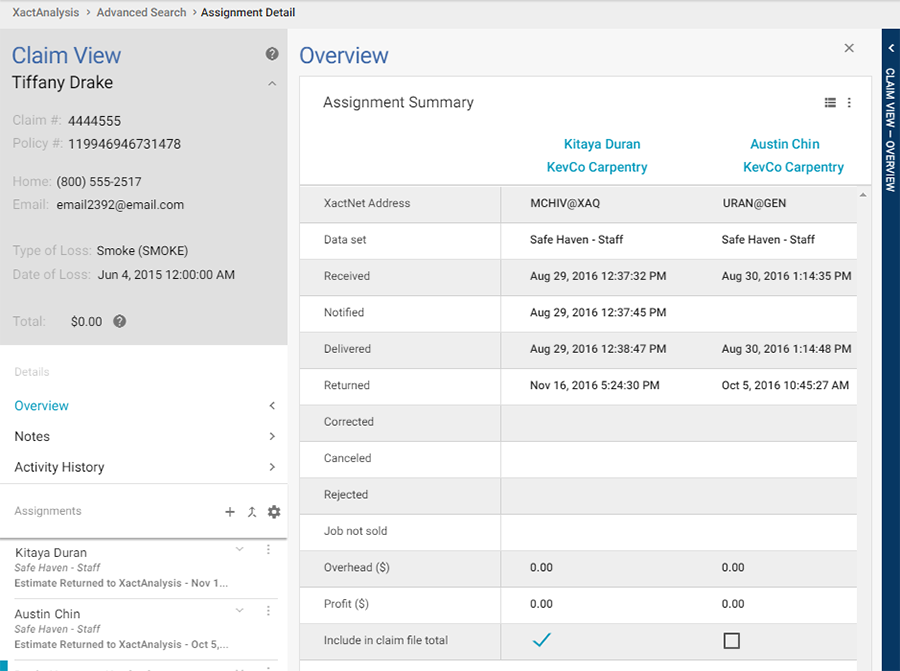
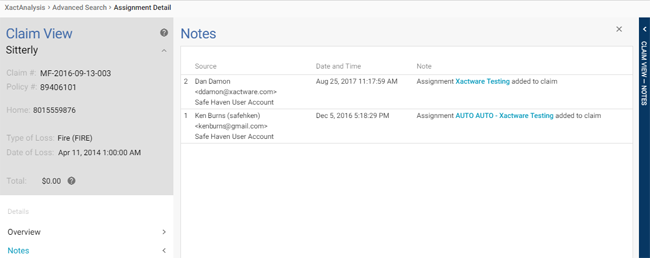
The top section of Claim View contains general information for the claim file. This information comes from the first attached assignment. The Type of Loss , Date of Loss, and contact information fields are populated by the attached assignment with the earliest date of loss . You can expand or collapse this section by clicking ![]() to the right of the information.
to the right of the information.
Claim #
The unique combination of letters and numbers used to identify the claim file.
Policy #
The policyholder's policy number.
Home, Business, or Mobile
Any home, business, or mobile phone numbers provided for the policyholder.
The policyholder's email address.
Type of Loss
The type of loss for the attached assignment with the earliest date of loss.
Date of Loss
The earliest date of loss from the attached assignments.
Total
The sum of the estimate totals for all attached assignments.
Edit claim file information
If you have the Edit Claim File Data application right, you can edit Policyholder Name, Claim #, and Policy # by clicking the edit icon ![]() that appears when you hover over these fields. The rest of the fields are populated by the attached assignment with the earliest date of loss.
that appears when you hover over these fields. The rest of the fields are populated by the attached assignment with the earliest date of loss.
Overview section
The Overview section provides an interactive table that contains general information from each of the attached assignments. You can click on the Overview header in Claim View to expand or collapse the section.
Select which rows are displayed
You can click  in the top-right corner of the table to select which assignment attributes or statuses appear as rows in the table.
View assignments in Assignment Detail
You can click an assignment's column header in the table to view that assignment in Assignment Detail.
Select assignments to include in total
You can select or de-select the check boxes in the Include in claim file total row to determine which assignments are included when calculating the claim file total.
Refresh data
To refresh the overview for possible changes, click  in the top-right corner and select Refresh data.
Export as spreadsheet
To export the overview as a CSV file, click in the top-right corner and select Export spreadsheet. This file can be viewed in Excel, Google Sheets, or any other application that supports CSV files.
Notes section
The Notes section provides a list of notes regarding assignments that are added, moved, or removed from the claim file. You can click on the Notes header in Claim View to expand or collapse the section.
Activity History Section
When you click the Activity History section in Claim View, it expands and provides a list of activities that occur on each of the attached assignments. You can click any of the activities to view them in Assignment Detail. The list is interactive and allows you to filter, search, order, and select the activities that appear in the list. Your list settings remain on your computer and appear every time you open the Activity History section.

Search for activities
To search the Activity History list for names or keywords, click  in the top-right corner and type them in the search field that appears.
Filter activities
To filter the Activity History list by specific XactAnalysis Users, Assignments, Assignment Activities, and Claim Activities, click  in the top-right corner and select the appropriate filter options.
Refresh activities
To check for recently added activities in the Activity History list, click in the top-right corner and select Refresh.
Sort activities
To determine the order of the Activity History list, click in the top-right corner and select Sort by most recent first or Sort by oldest first.
Print activities
To open a printer-friendly version of the Activity History list, click in the top-right corner and select Print.
Assignments section
The Assignments section displays a list of assignments linked to the claim file. The name, data set, statuses, and estimate amount for each assignment appears in assignment cards under the section header. You can click on any of them to view them in Assignment Detail.
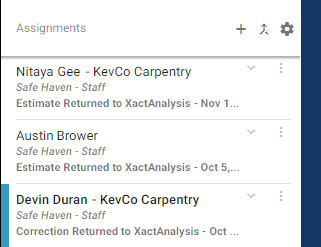
Expand assignment cards
Each assignment card displays the assignment's assignee, data set, and current XactAnalysis status. You can click ![]() to expand the card and view additional details, such as the assignment's current Workflow and Approval statuses and its returned estimate amount.
to expand the card and view additional details, such as the assignment's current Workflow and Approval statuses and its returned estimate amount.
Add a new assignment to the claim file
- Click
 in the Assignments header. This takes you to Send Work Assignment.
 - Enter the assignment information in the provided fields.
- Click Submit at the bottom of the page.
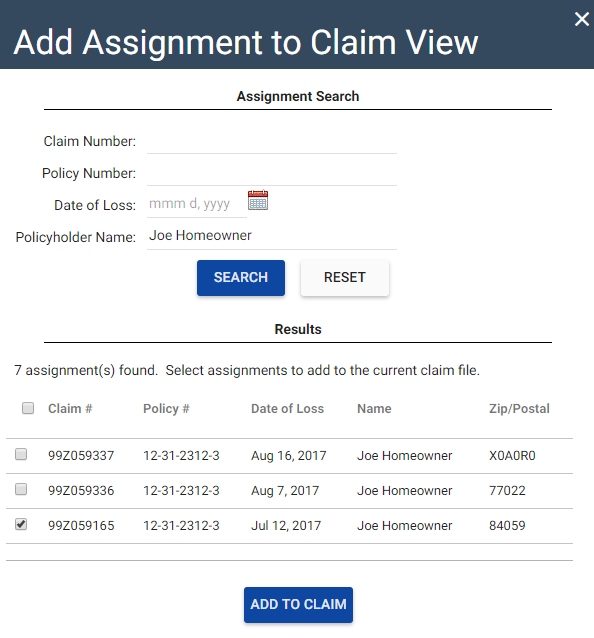
Attach an existing assignment to a claim file
- Click
 in the Assignments header. This opens the Add Assignment to Claim View dialog box.
 - Enter your search parameters in either the Claim Number, Policy Number, Date of Loss, or Policyholder Name field.
- Click Search.
- Select an assignment from the Results list and click ADD TO CLAIM.
Select the information displayed on assignment cards
- Click the Assignment Display Options icon on the Assignments header.
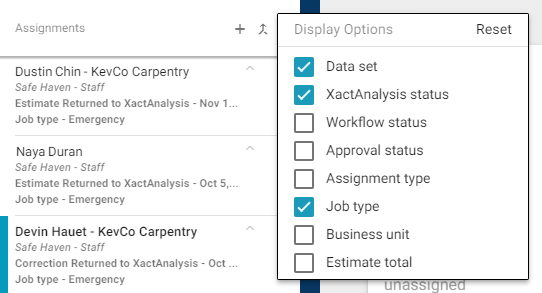
- Select the check boxes for the information you want displayed on the assignment cards.
- Click outside of the Assignment Display Options box when you are done.
Move an assignment to another claim file
- Click on the assignment you want to move.
- Select Move to... in the menu that appears. This opens the Add to Claim File dialog box.
- Enter your search parameters in either the Claim Number, Policy Number, or Policyholder Name fields.
- Click Search.
- Select a claim from the Results list and click ADD TO CLAIM.

Remove an assignment from a claim file
- Click on the assignment you want to remove.
- Select Remove from claim in the menu that appears.
- Click Remove in the dialog box that appears.