Xactware ID Help
 Updated
by
Arianne G.
Updated
by
Arianne G.
You need an Xactware ID to access your XactAnalysis® products and accounts. This document describes how to create and manage your Xactware ID, reset your password, link your XactAnalysis accounts to your Xactware ID, and notify new users to set up their Xactware IDs.
Related: FAQ > Login and password questions, FAQ > User Administration questions, Manage Accounts, Getting Started
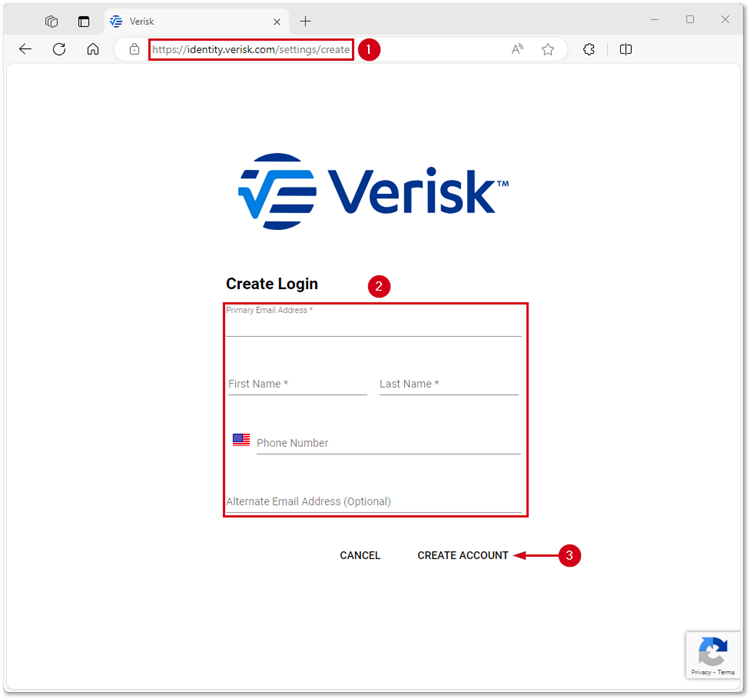
Create your Xactware ID
- On the XactAnalysis login page, click CREATE ACCOUNT. The Verisk Identify Server page loads.
- Fill in the form.
- Primary Email Address: This is the email that will be associated with the Xactware ID.
- First Name: This is the user’s first name.
- Last Name: This is the user’s surname.
- Phone Number: This is the user’s phone number.
- Alternate Email Address (Optional): This can be an alternate email to help in recovering an account.
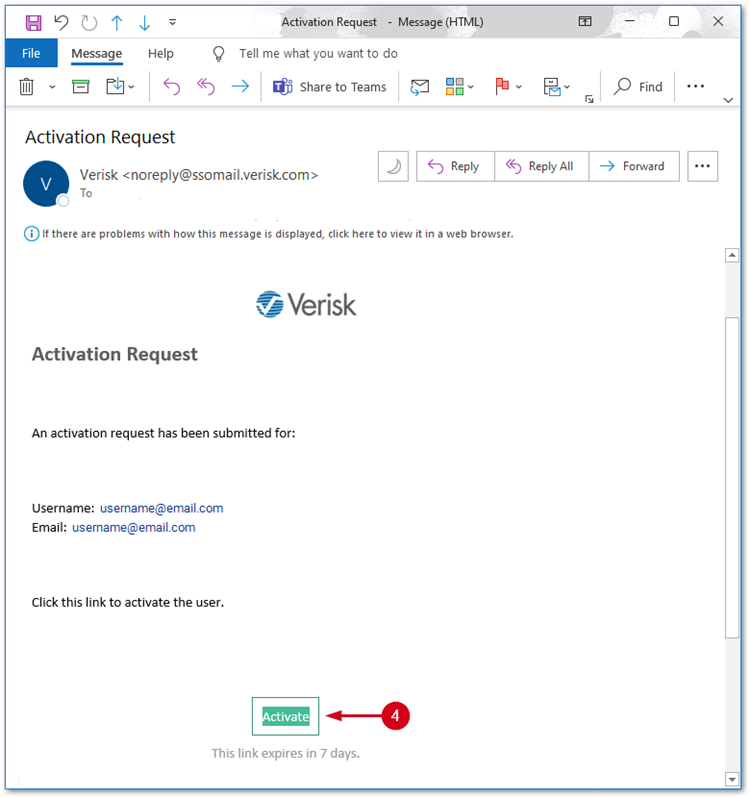
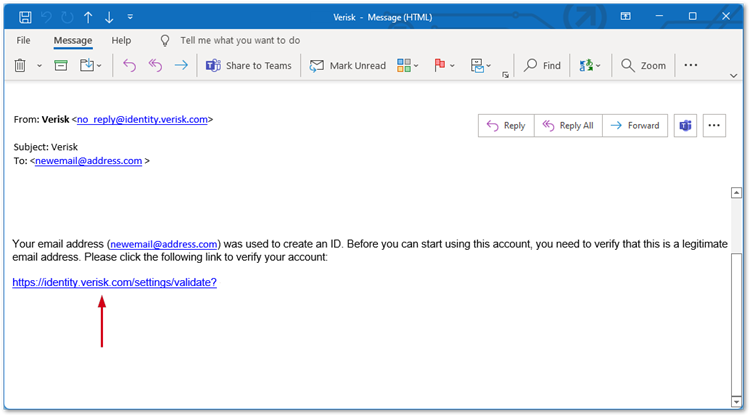
- Click CREATE ACCOUNT. An email will be sent from noreply@ssomail.verisk.com to the primary email address with the subject Activation Request.
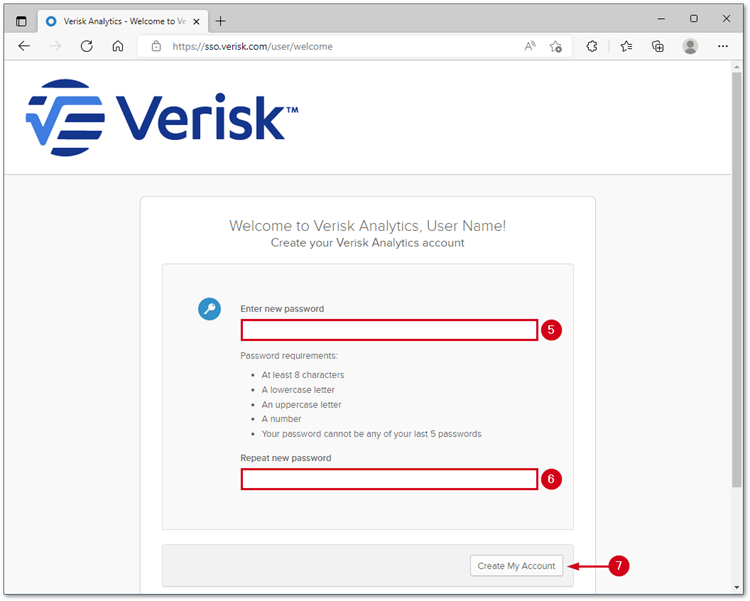
- In the verification email, click Activate.
- Enter a password.
- Confirm the password.
- Click Create My Account.
Modify an Xactware ID
The following steps will help you update any information. Only update what is needed.
- While logged into Verisk Identity Server, enter the new First Name.
- Enter the new Last Name.

- Enter the new email address into the Email field.
- Re-enter the email address into the Confirm Email field.
- Click SAVE. An Update Successful message will appear.
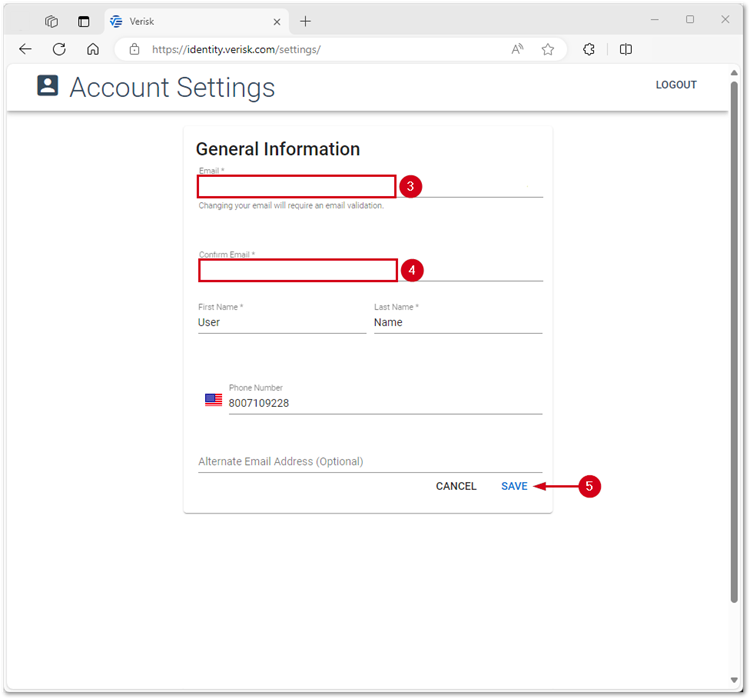
- Click OK.
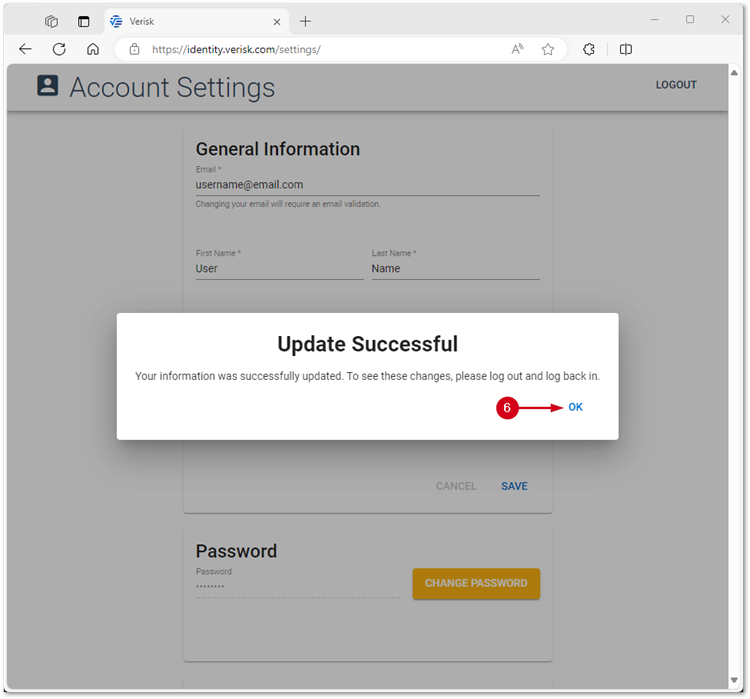
- Click LOGOUT.
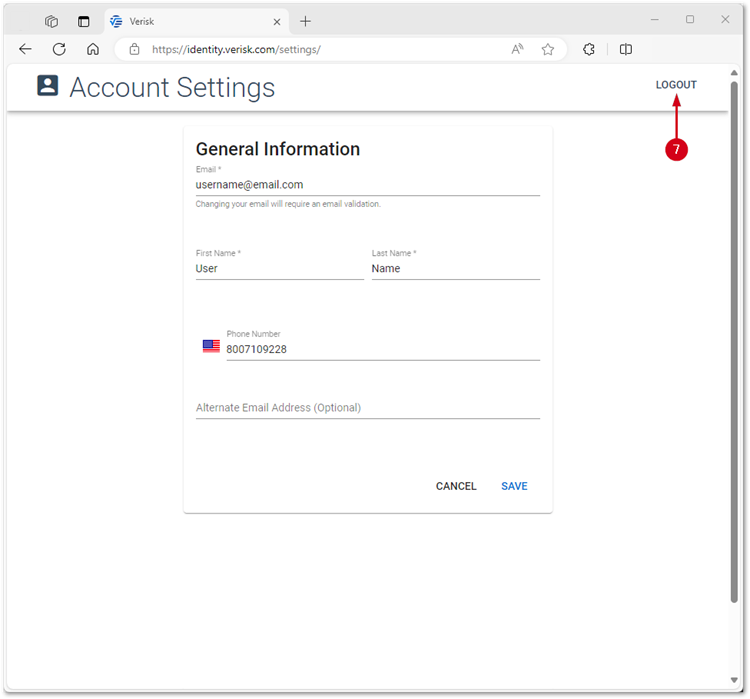
If you update the email address, a verification email will be sent to validate the new email address.
Reset or change password
Reset password
If you can’t remember your password, follow these steps to reset it.
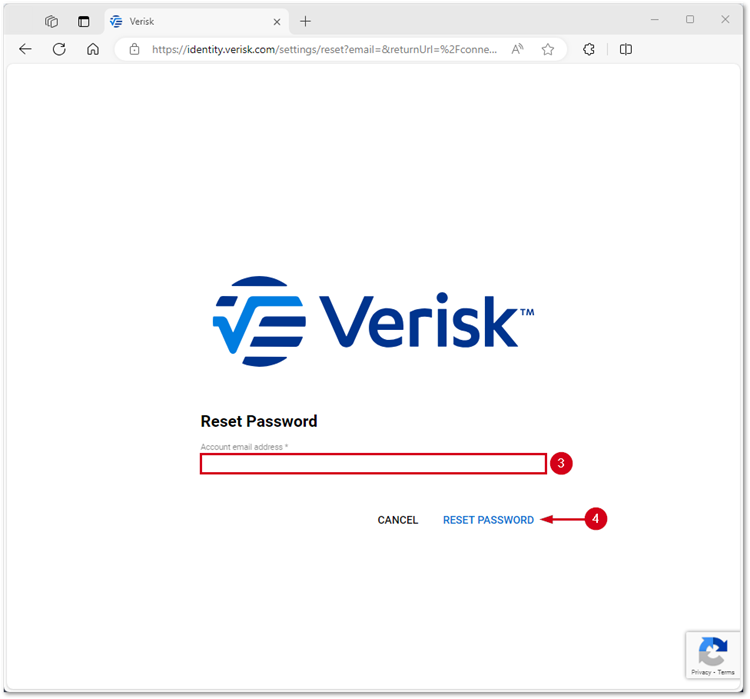
- Navigate to the Verisk Identity Server.
- Click Forgot your password?
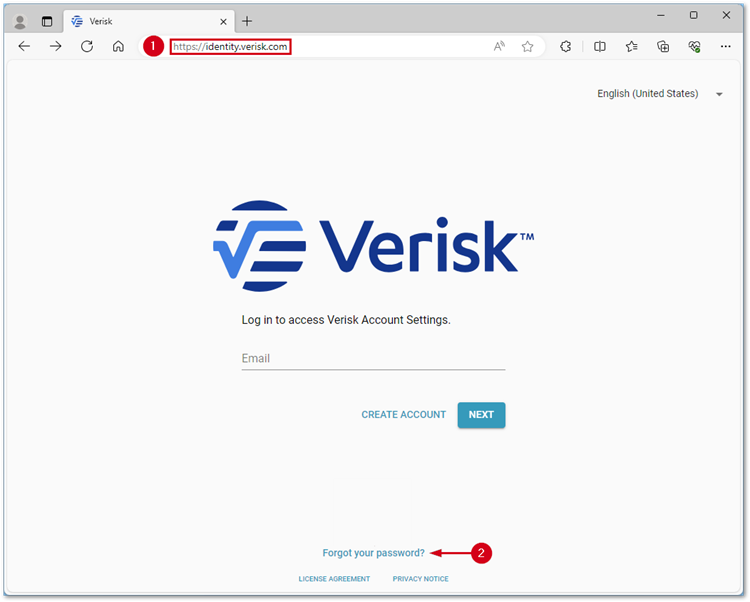
- Enter the Xactware ID in the Account email address field.
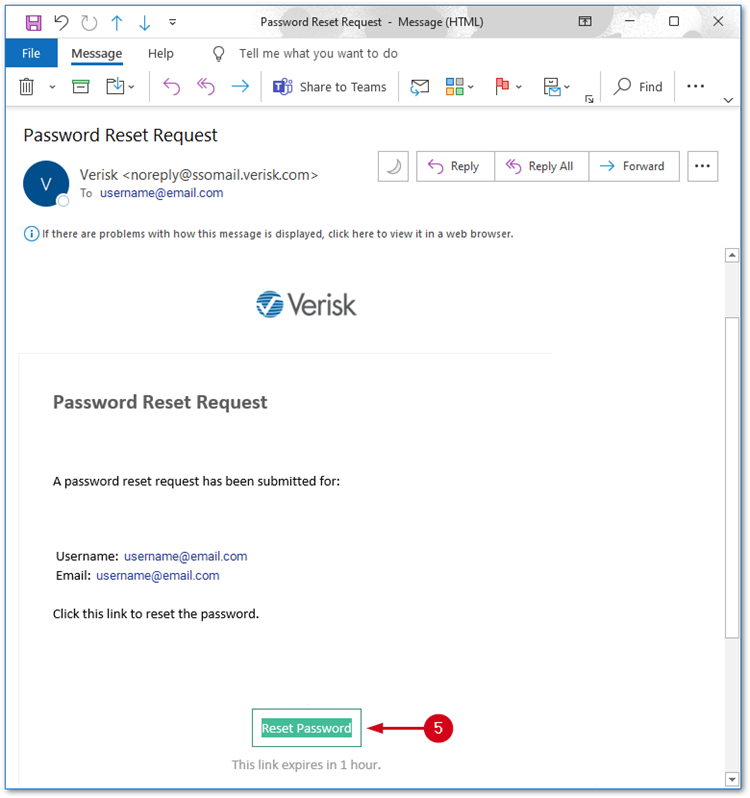
- Click RESET PASSWORD. An email will be sent from noreply@ssomail.verisk.com to the primary email address with the subject Password Reset.
- Click Reset Password in the email.
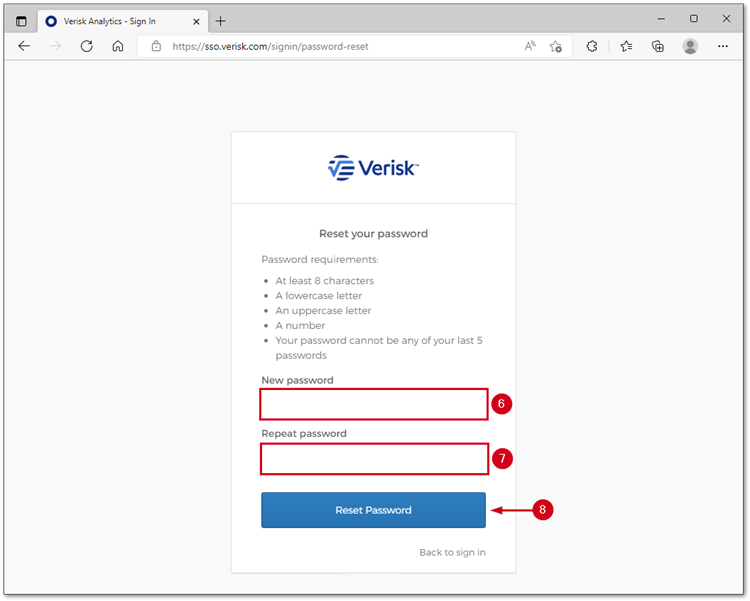
- Enter a New password.
- Confirm the new password.
- Click Reset Password.
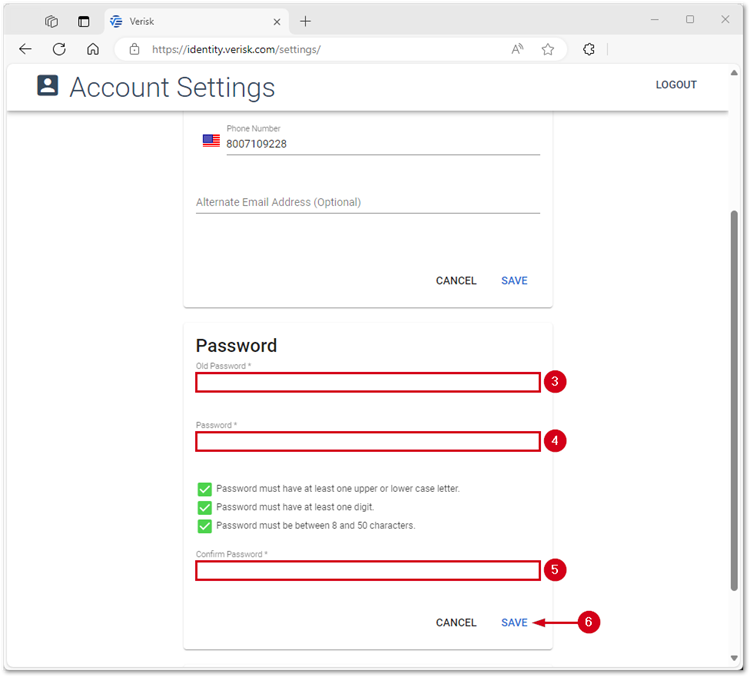
Change password
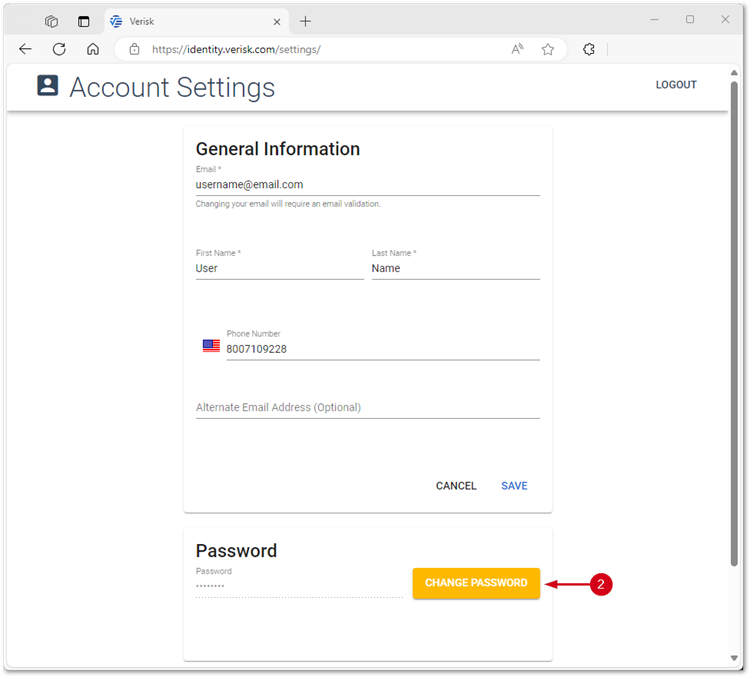
- Navigate to the Verisk Identity Server.
- While logged in under the desired user, click CHANGE PASSWORD.
- Enter the Old Password.
- Enter a new Password.
- Confirm the new password.
- Click SAVE.
Link your XactAnalysis accounts and log in
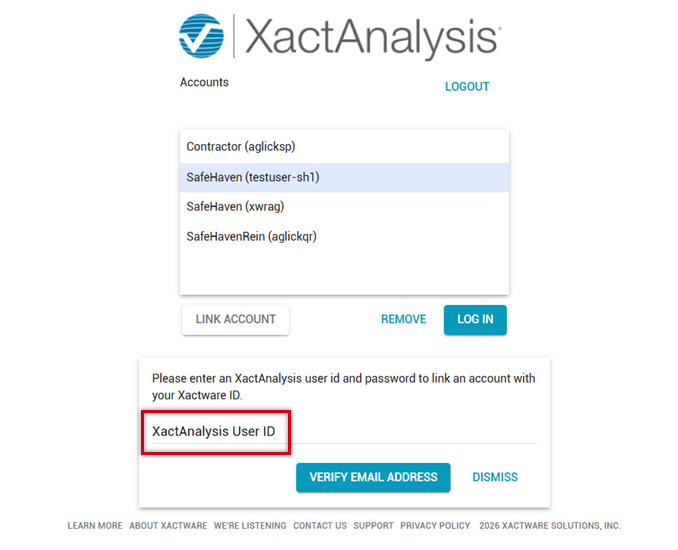
Accounts associated with your primary email address (Xactware ID) appear in the XactAnalysis Accounts area. If an account in this area is not linked with your Xactware ID, the account is labeled "unlinked." To link an account, follow the steps below:
- On the XactAnalysis landing page, select the account.
- If no accounts appear in the Accounts section, or if the desired account is missing, select Link Account.
- In the field that appears below, enter your XactAnalysis User ID for the account, and select Verify Email Address.
- Enter your XactAnalysis User ID and select Send Email.
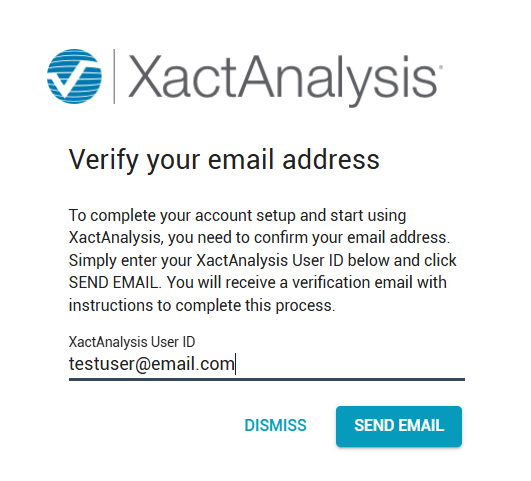
- Follow the instructions in the email to verify your email address.
- Return to the XactAnalysis landing page. The account is no longer labeled “unlinked” in the XactAnalysis Accounts area.
- Select the account and click Log In to go to the XactAnalysis Welcome page.
- To link more accounts, click your name in the upper-right corner of XactAnalysis and select Manage Accounts. This returns you to the landing page where you can link or unlink more accounts.
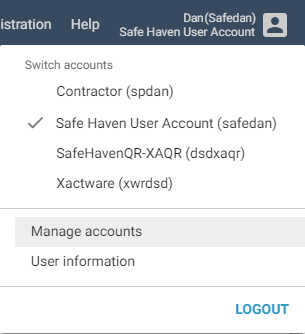
You can also select one of your other linked accounts from this menu to switch to that account. For more information, see Manage Accounts.
Notify new users to create and link Xactware ID
Administrators can notify new users that they need to create an Xactware ID and link it to their XactAnalysis account.
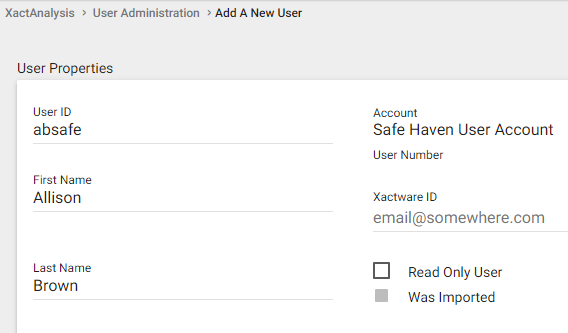
- In User Administration on the Add a New User page, enter the account information, including an Xactware ID, and click Save.
- If you enter an Xactware ID that matches the new user’s existing Xactware ID, when you click Save the user receives an email instructing them to link their Xactware ID to the new account. The email includes a link to the XactAnalysis login page.
- If you enter an Xactware ID, but the new user does not already have an Xactware ID, when you click Save the user receives an email that instructs them to set up an Xactware ID. The email includes a link to the Create an Xactware ID page.