Assignment Queue
 Updated
by
Mara K
Updated
by
Mara K
The Assignment Queue is a filter in Search that shows unassigned assignments. From the queue, you can assign one or more assignments to individual XactNet addresses in your organization.
The screenshots in this document are generic, and your company’s interface may vary.
Access Assignment Queue
There are two ways to access the Assignment Queue.
- Select Assignment Queue from the Assignments menu.
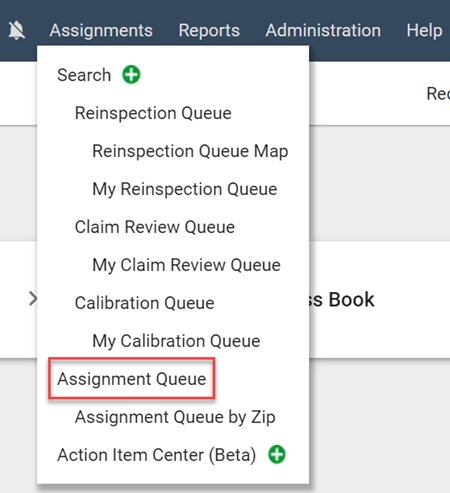
The Assignment Queue appears in the form of a map showing the location of each assignment.
- On the Search page, click Queue Type and select Assignment Queue from the dropdown menu. This filters the list so that only assignments with the status In Assign Queue are shown.

Filter assignments in map view
The filters across the top of the map allow you to easily locate specific types of assignments. When you select an option from each of the filters, the map automatically updates to only display assignments that meet your criteria.

Data Set Group
Only display assignments from specific data sets.
Business Unit
Only display assignments associated with specified business units in your company.
Type of Loss
Only display assignments with specified types of loss.
Date
Only display assignments that entered a specified status within a specified date range. After you click the menu, you can select date ranges with the date picker, or you can select one of the preset date ranges from the provided list. You can click Add Date Filter to filter by additional statuses and date ranges.
CAT Code
Only display assignments with a specific CAT code. Alternatively, you can select the CAT check box to only display assignments with CAT codes or the Non-CAT check box to only display assignments without CAT codes.
Assignment Type
Only display assignments with specified assignment types.
Policy Type
Only display assignments with specified policy types.
Job Type
Only display assignments with specified job types.
Appointment
Only display assignments with or without appointments scheduled.
Attention Needed
Only display assignments that are marked as Attention Needed.
Map features
The Assignment Queue map uses Google Maps to display the location of every assignment that is currently in progress (colored shapes) or unassigned (red location markers).
Markers
See the list below the image to identify each of the markers used in the map.
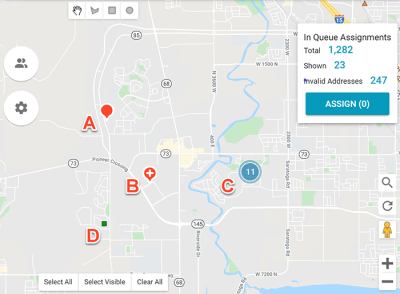
A - This marker indicates the location of a single assignment. You can click the marker to select it, or you can hover over it to view the assignment's claim number and type of loss.
B - This marker indicates multiple assignments at a location. You can click the marker to select all of the assignments, or you can hover over it to select individual assignments.
C - Blue circles represent clusters of assignments in an area. The number of assignments is displayed in the circle. Click the circle to zoom in and view the individual assignments and any additional clusters.
D - Colored geometric shapes indicate assignments that are assigned and in progress. You can hover over it to view the assignee's current workload information.
Navigation tools
The tools in the bottom-right corner allow you quickly navigate the map.
- You can click the magnifying glass button to quickly zoom in on a specified country or zip code.
- You can click the plus and minus buttons to zoom in and out on the map. You can also use your mouse wheel or touch pad.
- You can click the pegman button and drag it to a location on the map to view actual photo imagery of the location.
- You can click the reset button to reset the map to its default zoomed-out view.
Selection tools
To select individual assignments, simply click their markers. The map also provides time-saving tools that allow you to select multiple assignments at once.
- Select the hand tool at the top of the map to drag the visible area of the map in any direction.
- Select the polygon tool at the top of the map to draw custom shapes around the markers you want to select.
- Select the rectangle tool at the top of the map to draw rectangles around the markers you want to select.
- Select the circle tool at the top of the map to draw a circle around the markers you want to select.
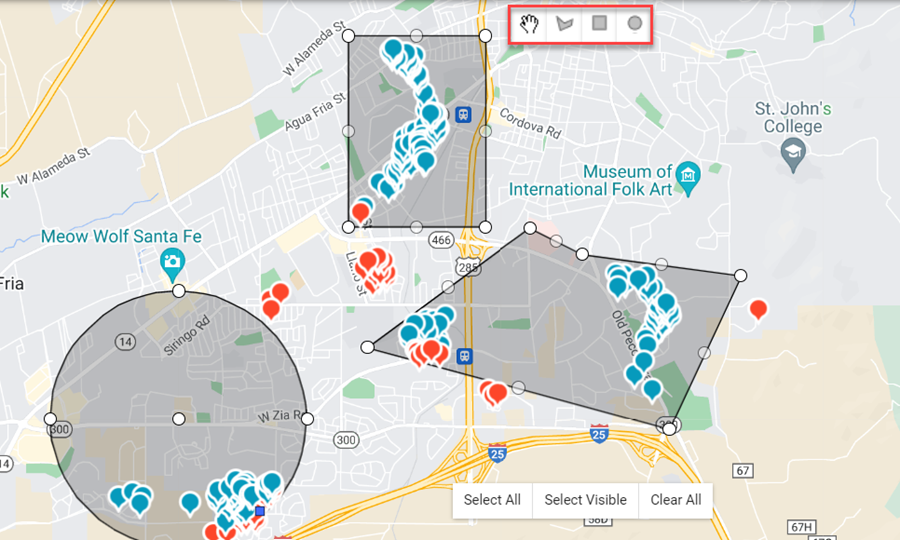
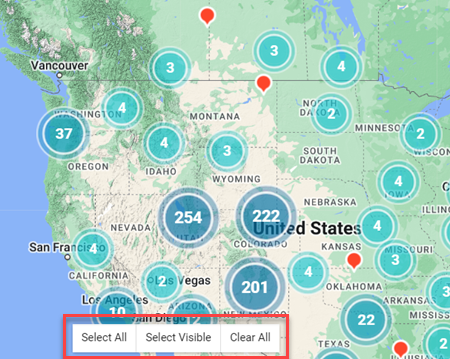
- Click Select All at the bottom of the map to select all of the assignments on the map.
- Click Select Visible at the bottom of the map to select all of the assignments in the visible area of the map.
- Click Clear All at the bottom of the map to deselect all assignments.
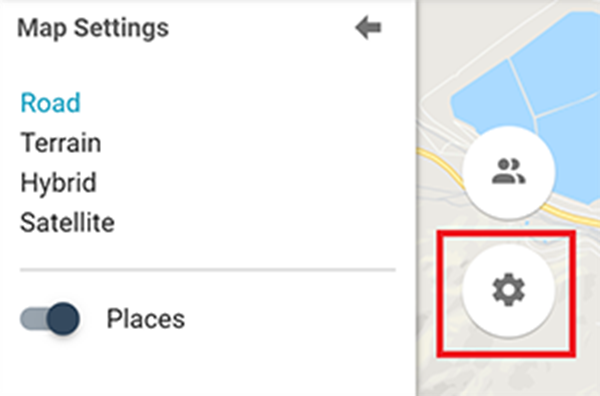
Map Settings
The map settings button on the left side of the map allows you to change the appearance of the map. It also allows you to enable or disable the markers for local places and landmarks.
Assign from Search
- Select the checkboxes for the assignment(s) you want to assign.
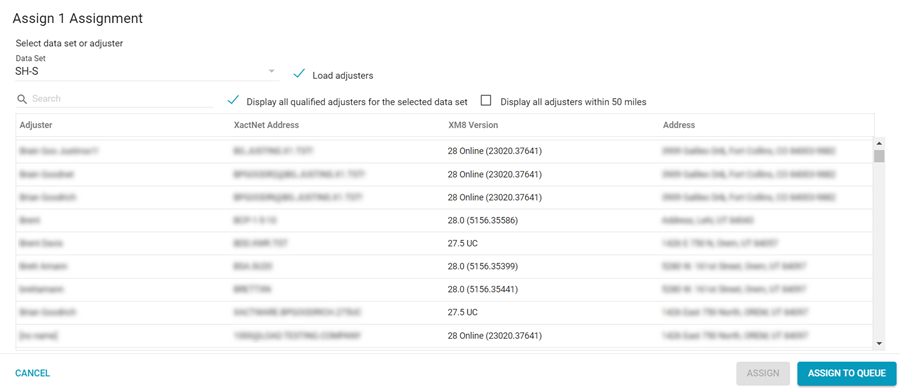
- Select Assign from the Select an Action menu. The Assign Assignment window appears.
- Assign the assignment to an entire data set or to a specific adjuster.
- To assign to an entire data set, select your chosen data set from the dropdown menu, and then click Assign to Queue.
- To assign to an adjuster, select the Load adjusters checkbox. Next, select an adjuster from the list or search for a specific adjuster, and click Assign.