Search
 Updated
by
Mara K
Updated
by
Mara K
Search is a powerful feature that allows you to filter and view any combination of assignments in your company. You can customize your results by adding columns, using saved column and filter sets, completing actions for selected assignments, and even mapping the locations of your results.
Search uses live data, meaning that as soon as an assignment is created, you can find it with the available filters.
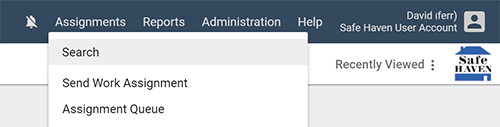
Access Search
Select Search from the Assignments menu.
Use filters
You can use the filter menus to refine your Search results. The ribbon across the top of the page contains the most common filters, but you can also click Filters in the ribbon to apply additional filters. For a complete list of filter descriptions, see Search filters.

Filter with wildcards and exact matches
Many of the filters allow you to type search criteria. By default, these filters return results that start with your criteria. You can change the default behavior with wildcard searches or an exact match search:
- Type an asterisk before your criteria to return results that end with your criteria (*example).
- Type an asterisk in the middle of your criteria to return results that begin and end with your criteria (exa*mple).
- Type an asterisk before and after your criteria to return results that contain your criteria (*example*).
- Type quotes before and after your criteria to only return results that match it exactly ("example").
Create a filter set
If you have a group of filters that you often use together, you can save them as a filter set and apply them all at once.
- Click Filters on the left side of the filters ribbon. This opens the Filters drawer.
- Click the More Filters menu and select a filter. The filter is displayed in the drawer as a blue box.
- Depending on the filter you selected, type or select options in the filter's menu.
- Repeat steps 2-3 until you apply all desired filters.
- Click the Add button next to the Filter Sets menu.
- Type a name for the filter set in the field that appears.
- If you want to include the date range as part of your filter set, select the Include date range checkbox.
- If you want to make the set available to other users in your account, select the Make account set checkbox.
- Click the checkmark button next to the Filter Sets menu.
Apply a filter set
You can instantly apply a saved group of filters to the results list.
- Click Filters on the left side of the filters ribbon. This opens the Filters drawer.
- Click the Filter Sets menu and select a filter set.
Edit a filter set
You can edit an existing filter set.
- Click Filters on the left side of the filters ribbon. This opens the Filters drawer.
- Click the Filter Sets menu.
- Select a filter set.
- Make changes to your filters or filter options.
- Click the check mark button next to the Filter Sets menu.
Select a default filter set
You can select a default filter set that is applied every time you log in to XactAnalysis.
- Click Filters on the left side of the filters ribbon. This opens the Filters drawer.
- Click the Filter Sets menu.
- Hover over a saved filter set. A star appears to the left of it.
- Click the star.
Delete a filter set
- Click Filters on the left side of the filters ribbon. This opens the Filters drawer.
- Click the Filter Sets menu.
- Click Delete next to a filter set.
- Click OK when prompted to confirm.
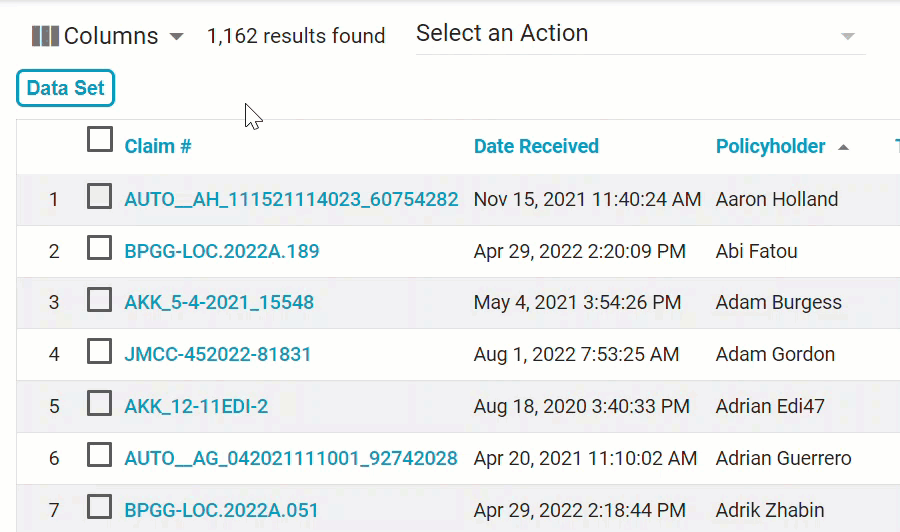
Use columns
You can choose which assignment data you see in your search results by customizing the columns.
- You can click and drag column headers to rearrange their order
- You can click the blue header names to sort the list by them in alphabetical or reverse-alphabetical order
- You can add and remove columns
- You can name and save column sets
- When you add a filter, the names of related columns appear in blue boxes above the results list. You can click any of these boxes to add the corresponding columns to the results list.
Create a column set
If you have a group of columns that you often use together, you can save them as a column set and apply them all at once.
- Click the Columns menu.
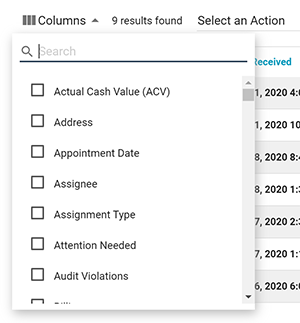
- Select the columns you want to display from the menu. Default columns are grayed out to indicate that they can't be removed.
- Click and drag the column headers to arrange them in the order that you want.
- Click any blue column header to sort the results by that column in alphabetical or reverse-alphabetical order.
- Click Add + to the right of the Column Sets menu.
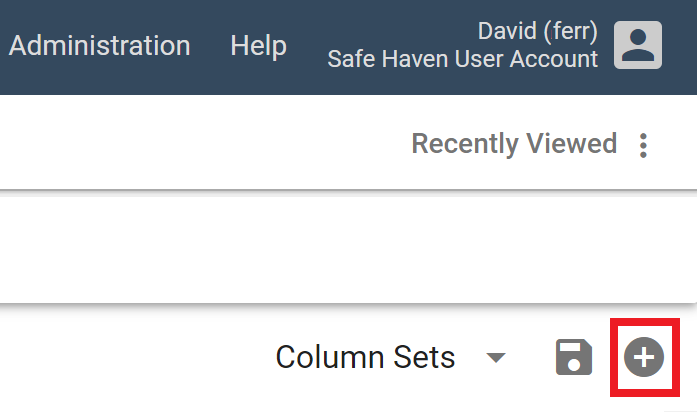
- Type a name for the column set in the field that appears.
- If you want to make the set available to other users in your account, select the Make account set check box.
- Click the Save check mark.
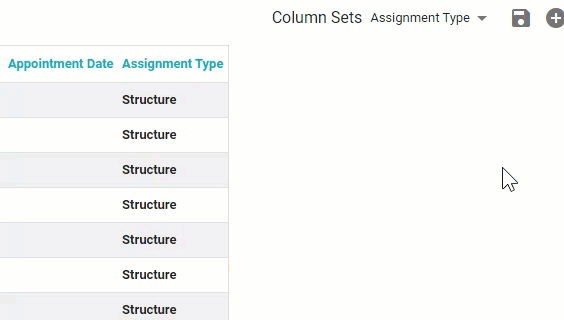
Apply a column set
You can instantly apply a saved group of columns to the results list.
- Click the Column Sets menu in the top-right corner of the page.
- Select a column set.
Edit a column set
- Click the Column Sets menu.
- Select a column set.
- Make any necessary changes to the columns or their order.
- Click Save next to the Column Sets menu.
Select a default column set
You can select a default column set that is applied every time you log in to XactAnalysis.
- Click the Column Sets menu.
- Hover over a saved column set. A star appears to the left of it.
- Click the star.
Delete a column set
- Click the Column Sets menu.
- Click Delete next to a column set.
- Click OK when prompted to confirm.
Select multiple consecutive assignments
If you want to perform an action on a group of assignments in Search, you can select those assignments all at once.
- Select the checkbox next to the first assignment in your group.
- Press the Shift key and hold it while selecting the checkbox next to the last assignment in your group.
All of the assignments between these two are automatically selected.
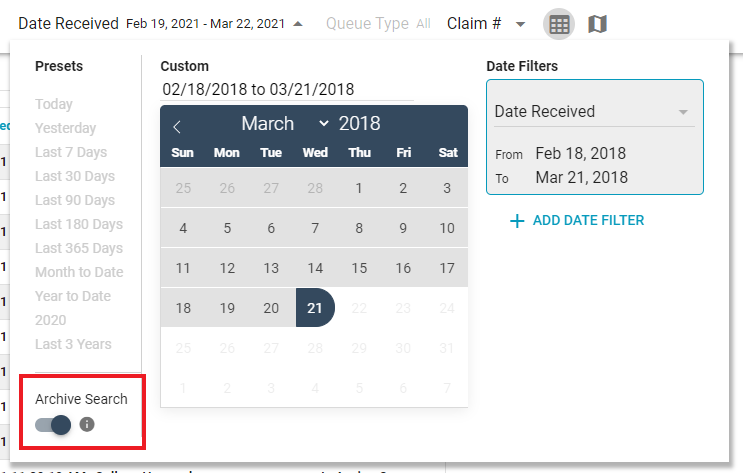
Use Archive Search mode
Search allows you to find assignments up to three years from the current date. If you need to find an assignment from before that time, you can enable Archive Search Mode.
- Click the date filter at the top of the page.
- Enable the Archive Search toggle switch in the dialog box that appears.
- Select a date range older than three years ago from the date picker.
Open assignments in a new tab
Search allows you to open assignments in the same browser tab or in a new browser tab.
To enable or disable this feature, click the button next to the Column Sets menu. When the button is gray, assignments open in the same tab. When the button is blue, assignments open in a new tab. Search remembers your selected preference every time you navigate to it.

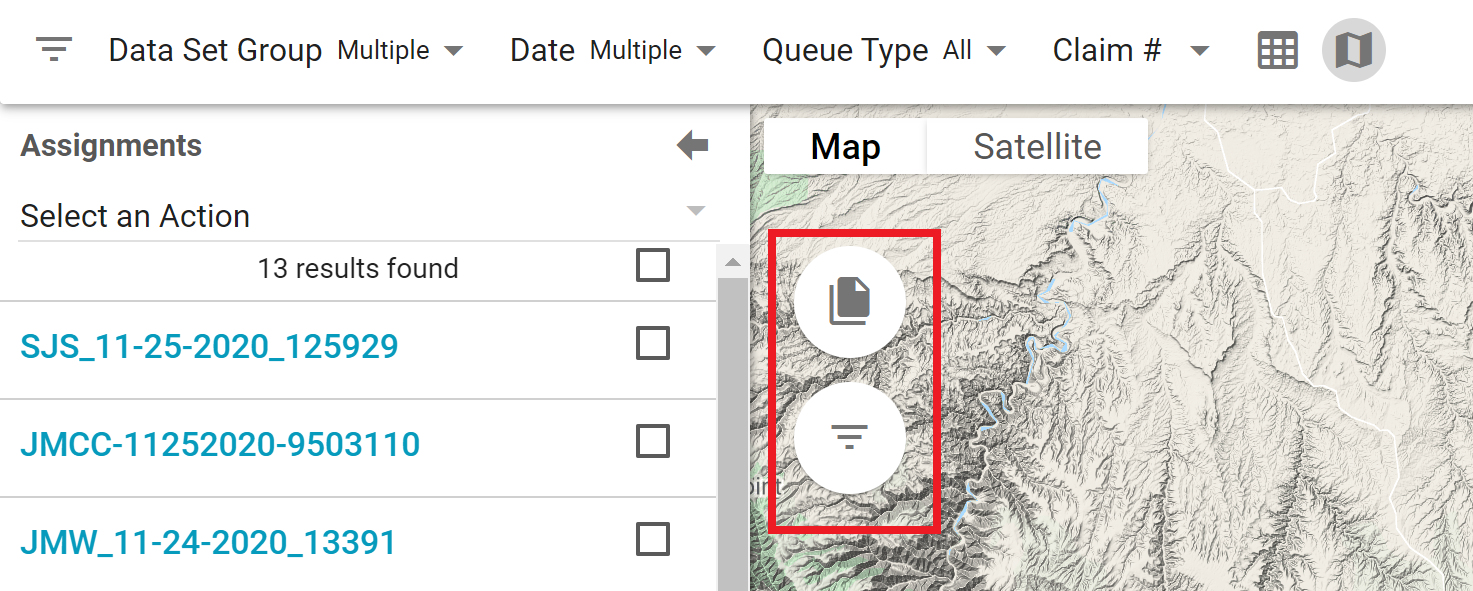
Use map view
You can see your Search results in both a table view and a map view that plots your filtered assignments on a map. To switch to the map view, click the View toggle near the top of the page.
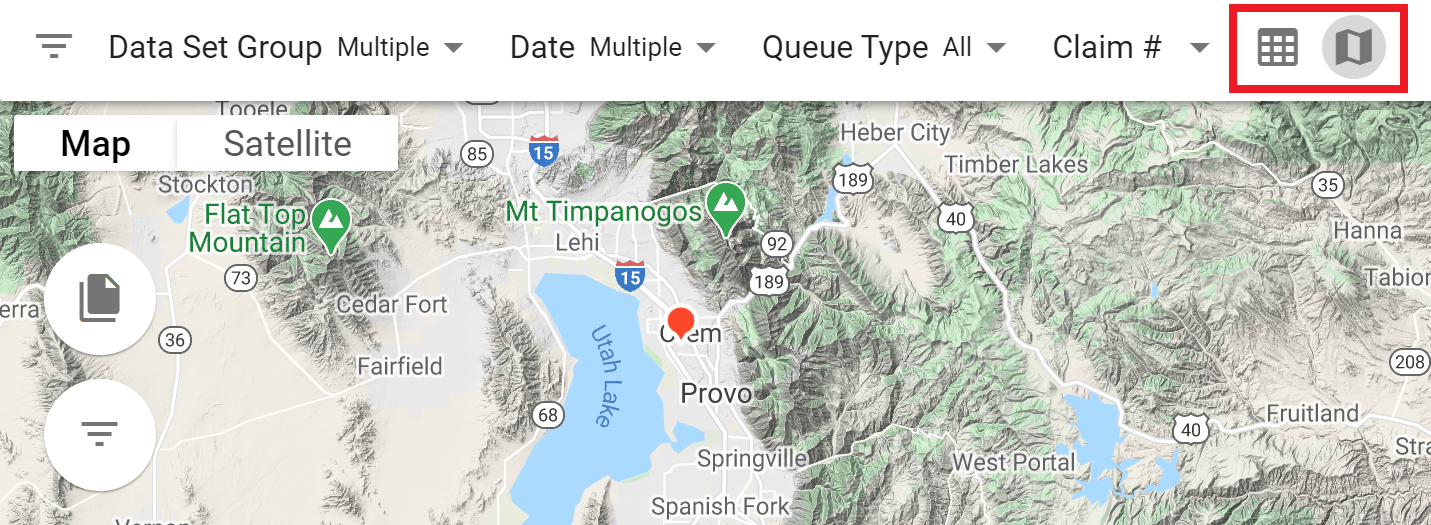
- Map view uses Google Maps, so you can use the buttons around the edges of the map to zoom in and out, switch to satellite view, view photo imagery of a location, and expand the map to full screen.
- You can hover over an assignment marker to view its claim number and the name of its insured. Click on the claim number to view it in Assignment Detail.
- An assignment marker with a plus symbol indicates multiple assignments at that location. You can hover over the marker to view the assignments.
- You can click Assignment List to open the Assignments drawer and perform actions for assignments marked on the map. Select the check boxes for one or more assignments and then select an option from the Select an Action menu in the drawer.
- You can click Filters to open the Filters drawer and apply filters while in map view.
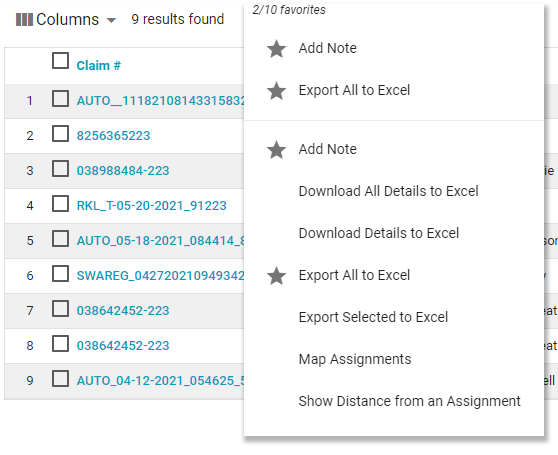
Pin options in the Select an Action menu
You can select up to ten of your favorite options from the Select an Action menu and pin them to the top of the menu for easy access.
- Click the Select an Action menu.
- Hover over an option.
- Click the star that appears to the left of the option.