Organization Hierarchy
Organization Hierarchy allows you to set up your company’s organizational structure in XactAnalysis®. This is done by grouping claim reps, adjusters, individual contractors, and managers (anybody who has an XactNet® address) into overlapping teams based on a company’s unique chain of command.
XactAnalysis accommodates seven different command levels, often the top level equivalent to a corporate management and a bottom level equivalent to individual claim reps or adjusters. The number and names of organizational levels will vary from company to company; however, the basic function remains the same.
When you set up an organization hierarchy in XactAnalysis, you can apply different program rules and personal rules to different levels and branches of a hierarchy. You can also generate Management and Activity Reports and apply Advanced Search filters based on your organization hierarchy.
The screen shots in this document are generic, and your company’s interface may vary.
Related: User Administration, Management/Activity Reports, Advanced Search, Adjusters/Contractors
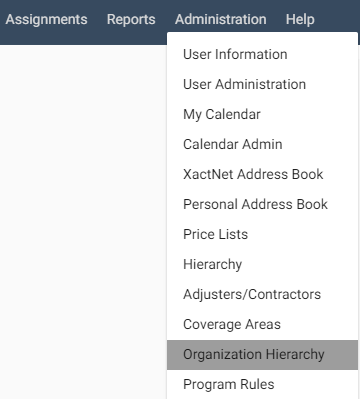
Access Organization Hierarchy
- Select Organization Hierarchy from the Administration menu.
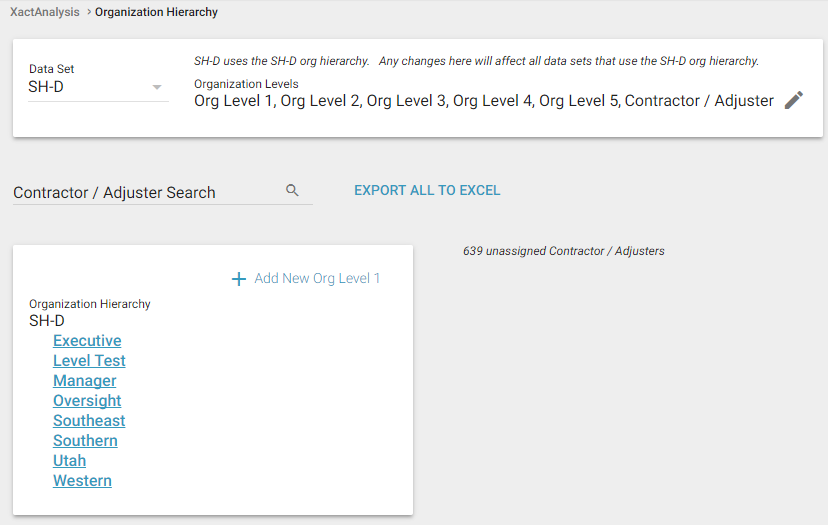
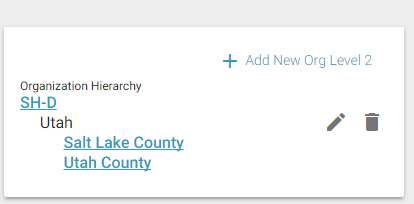
The Organization Hierarchy page appears.
Add or edit organization levels
- Select a Data Set.
- Click the Edit icon next to the Organization Levels section. The Organization Level Names dialog box appears.
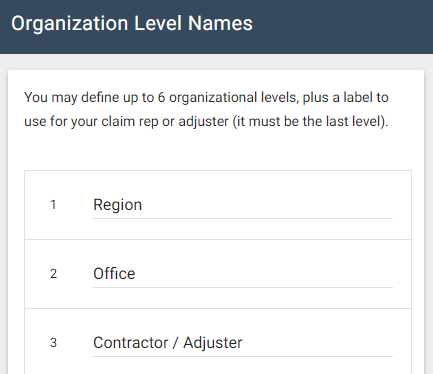
- Name or rename your organization levels as desired. You may define up to six organization levels, as well as a label to use for your individual claim reps or adjusters.
- Click Save. The organization level names appear in order in the Organization Levels section.
Set up or make changes to the organization hierarchy
Each level and branch of the hierarchy is set up with the same process. Additionally, organization hierarchy names vary from company to company. This example will walk through setting up Safe Haven’s corporate-level hierarchy.
- Click Add New Corporate (this name is configurable in the Organization Levels section) in the Organization Hierarchy tree. The Add Corporate Name dialog box appears.
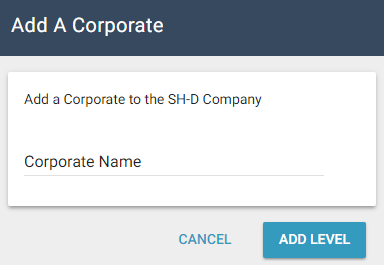
- Type in your desired corporate name. Click Add Level.
- The new organization hierarchy level appears in the Organization Hierarchy tree.
- Repeat these steps to add groups to any level of your hierarchy.
Delete an organization level
- Click an organization level in the Organization Hierarchy tree.
- Click the Delete icon.
Assign individuals to the organization hierarchy
- Click the name of an organization level or branch in the Organization Hierarchy tree.
- Select Assign Claim Reps (this name is configurable in the Organization Levels section) from the Select an Action menu. The Assign Claim Rep dialog box appears.
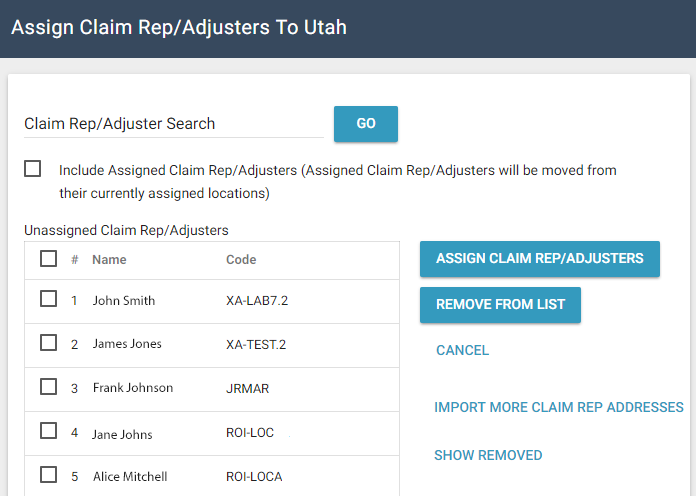
- Select the check boxes for the individuals you want to add.
- Click Assign Claim Reps. The names and XactNet addresses of the individuals you selected appear next to the Organization Hierarchy tree.
Remove individuals from an organization hierarchy level or branch
- Click the name of an organization level or branch in the Organization Hierarchy tree.
- Select the check boxes for the individuals you want to remove from the Assigned Claim Reps table.
- Select Remove Selected Claim Reps from the Select an Action menu. The individuals are removed from the Assigned Claim Reps table and are added to the unassigned claim reps list.
Import additional XactNet addresses
- Select Assign Claim Reps (this name is configurable from the Organization Levels section) from the Select an Action menu. The Assign Claim Reps dialog box appears.
- Click Import More Claim Reps Addresses. The Import Claim Reps Addresses dialog box appears.
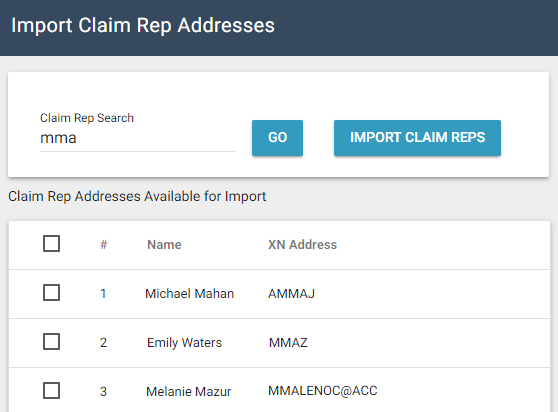
- Type a name, partial name, XactNet address, or partial XactNet address into the Claim Rep Search field.
- Click Go. A table with your search results appears.
- Select the check boxes for the individuals you want to import. Click Import Claim Reps.
- A confirmation dialog box appears. Click OK. The individuals will be added to your Available Claim Reps list.